There are several different ways to secure a warp on the loom in a way that will allow you to tension the warp and weave easily.
New weavers are often taught to tie the warp directly to the front apron rod, which is known as “tying on.” Many weavers continue to use the method that they are originally taught for the entirety of their weaving life.
I am going to take you along with me while I tie on, and will let you in on some of the tips and tricks that I use as we go.
This happens to be a warp for doubleweave which conveniently has dark ends on two shafts and light ends on the other two. That should make it easy to see what each half of the knot is doing in the pictures.
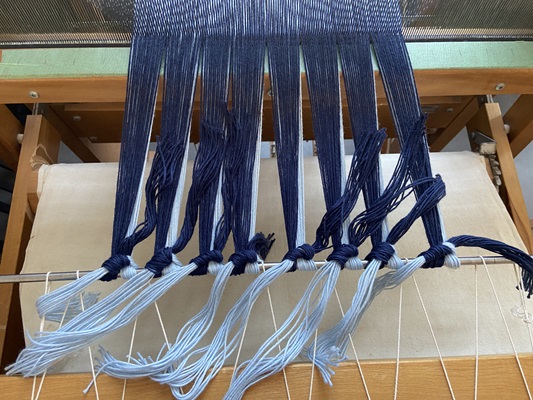
Here’s the warp after it’s beamed, threaded, sleyed and ready to be tied on:
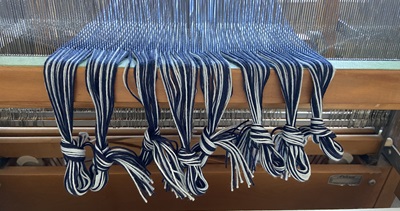
As I sley, I tie a slip knot roughly every inch or so in order to prevent any disasters, like the threads being pulled out of the reed.
The loom I am working on in these photos is a LeClerc Artisat. It has an apron and two rods to attach the warp to the cloth beam. I make sure that the rod that I will tie on to is in a position that is approximately 4” closer to the reed than the ends of the warp. This makes the tails of the warp long enough to manipulate easily, so that it’s easier to tie-on.
I tie on in two passes: on the first pass I’m just attaching all the warp ends to the apron rod and not worrying too much about getting the tension even. On the second pass, I even out the tension.
Pass #1: Attaching the warp to the apron rod
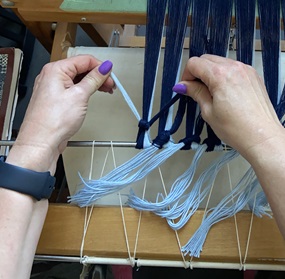
I generally start tying in the center of the warp. You can start anywhere, but I find that starting in the middle keeps the rod from becoming unruly.
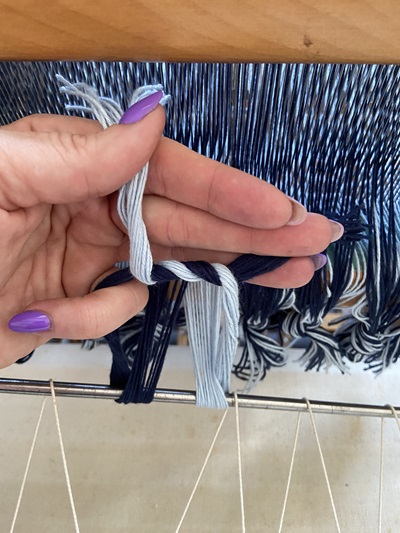
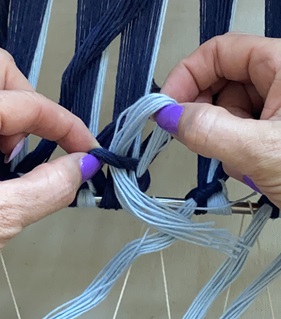
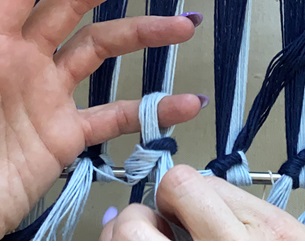
Remember those groups in slipknots? I use those same groups when I tie on. I take the threads of each group and split them in half. Here, I was able to lift half of the shafts in use, which made it easy to split the group in half. (How convenient that this makes the halves light and dark, which makes showing the steps easier! )
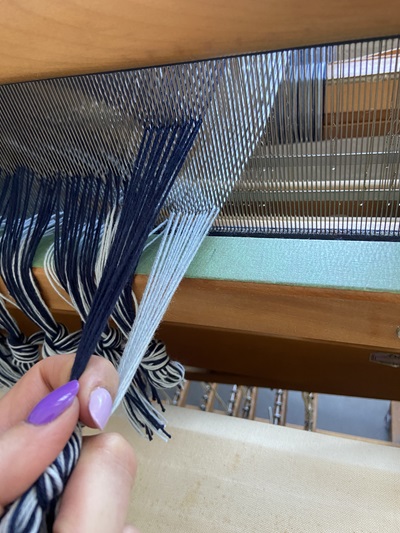
I put some tension on those threads and smooth them along the length of the group so they are nice and orderly, with even tension.
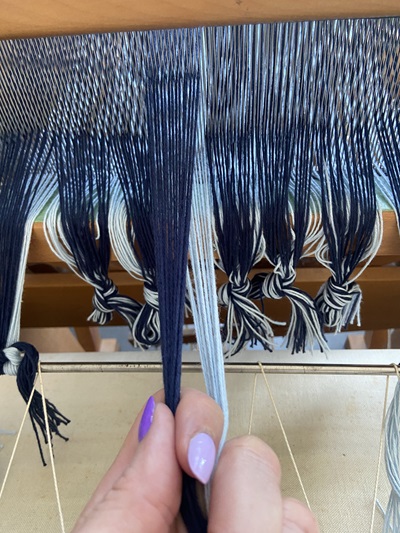
Then I take both halves of the group of ends over the top and around the rod, pulling the left half of the threads around and up on the left side and the right half of the threads around and up on the right side:
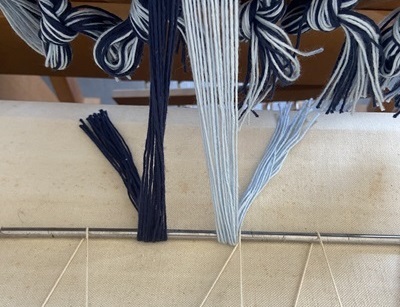
At this point, I twist one “side” of the group around the other twice to form half of a surgeon’s knot:
Then I tighten the knot just enough that it will hold the rod and not come loose while I manipulate the rest of the warp.
My preference is to first tie on a group of threads at or close to the center of the warp. Then I tie on the rest of the groups working from the middle to the edges, alternating between the right and left sides. You, however, can do this in any order that pleases you and the weaving police will not show up!
Pass #2: Adjusting the tension
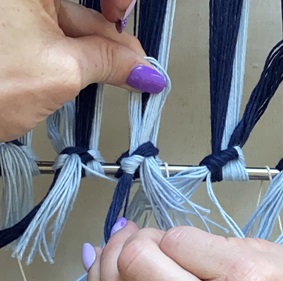
Once the entire warp is tied on with half surgeon’s knots, I advance the cloth beam until there is light tension on the warp. At this point, the tension is looser than it will be when I actually start weaving, so I can still move things around if needed.
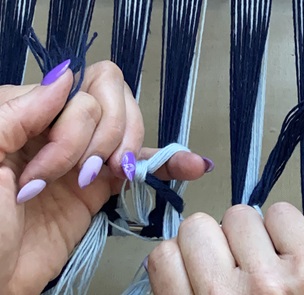
In order to tighten the warp, first I grab both tails of a single knot and pull them toward the reed. This adds the same amount of tension to all the ends in that group at once. Then I cinch the knot down and make it tight by pulling the tails towards the edges of the warp.
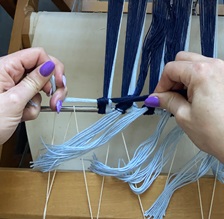
It is important that I am not tightening the warp to weaving tension at this point. My goal is to tighten all of the warp groups so each has the SAME tension, all the way across the warp.
If I pull a knot too tight and need to loosen it, I take the tail that is angled away from the reed (the light tail, in this case), and pull it up and to the right. The knot will “pop” out of position, which makes untying it quite easy.
I move across the entire warp, tightening up all the knots, until I’m satisfied that the tension is even.
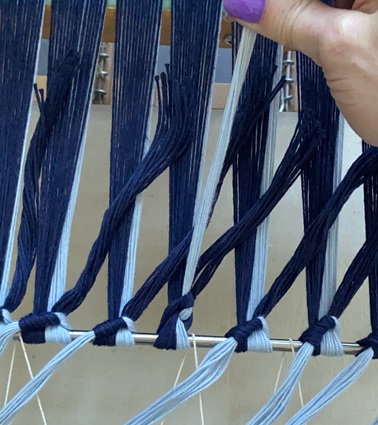
When I’m happy with the tension, I secure the warp with slip knots on top of the half surgeon’s knots. My favourite method is to cross the tails over again, right over left, then hook the left tail (the light one here) with my baby finger, pulling it through, and creating a loop with that tail that becomes the slipknot.
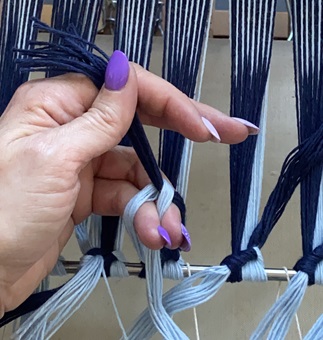
I keep hold of that loop, and tighten the right (Dark) tail.
This creates a tidy slip knot that is secure but still easy to remove, in case I need to fix a threading or sleying error.
I work my way across the warp until all the sections are secured with slip knots. When everything is secure, I advance my cloth beam to adjust the tension on the warp until it’s as tight as I like it to be while weaving.
Why this method?
There are a few reasons that I like to tie on this way:
It is the method I learned in my first weaving class. As such, I have used it more than any other method, and I am comfortable with it. I know that I can get nice even tension using this method.
It doesn’t require anything other than the apron rod, the warp, and my hands.
If there are threading or sleying errors (and there is likely to be at least one!), the slip knot makes it quite easy to untie a single group of ends, fix the error, and tie the group back on.
It allows me to easily adjust the tension on an individual group of threads.
It is important to note that this is not the “Right” way, the only way, or even the “Best” way to tie a warp on. It is simply the way that I tie a warp on. Feel free to try it exactly the way I do it, or pick and choose the parts that you think will make your tie on faster or easier!