
Have you ever been weaving along and realized that your weft thread caught on something a while back and you’ve got a big loop hanging out the side of your fabric?
Or noticed that several inches back you didn’t set the weft quite right at the selvage and you’ve got a tiny loop sticking out?
There are simple ways to fix each of these problems without unweaving, even if you don’t discover the problem until after the fabric is off the loom. You can even fix loops that aren’t really big or really tiny.
A few things to note before we get to the “how-to”:
Not for serial loops.
These solutions aren’t practical when you’ve got loops all the way up the selvage, as can happen when you’re consistently leaving too much slack in the shed. If you’ve got “serial loops” up the sides, then you need to solve that with beat and shuttle handling instead.
Loops form at the ends of two connected picks.
Each loop at the selvage is connected to two picks in the cloth: the one before the loop and the one after. The loop itself is an extra length of weft that extends from the selvage; all of the solutions below involve working that extra back into the middle of the cloth by pulling the slack up along one or both of the connected picks.
Use a large, blunt needle.
You don’t want to split the plies of the thread, so use a large gauge, blunt tipped needle if you have one. If your needle isn’t thick and blunt, use the eye of the needle rather than the tip, and you’ll be less likely to split the plies.
You can fix things on the loom, too.
The pictures and video below all show fabric that’s already cut off the loom, but you don’t have to wait. It can be even easier to fix things when the fabric is held stationary and kept under tension, assuming you notice the loops before the fabric they’re attached to rolls around the front beam.
Now for the how-to instructions, which depend on how big the loop is.
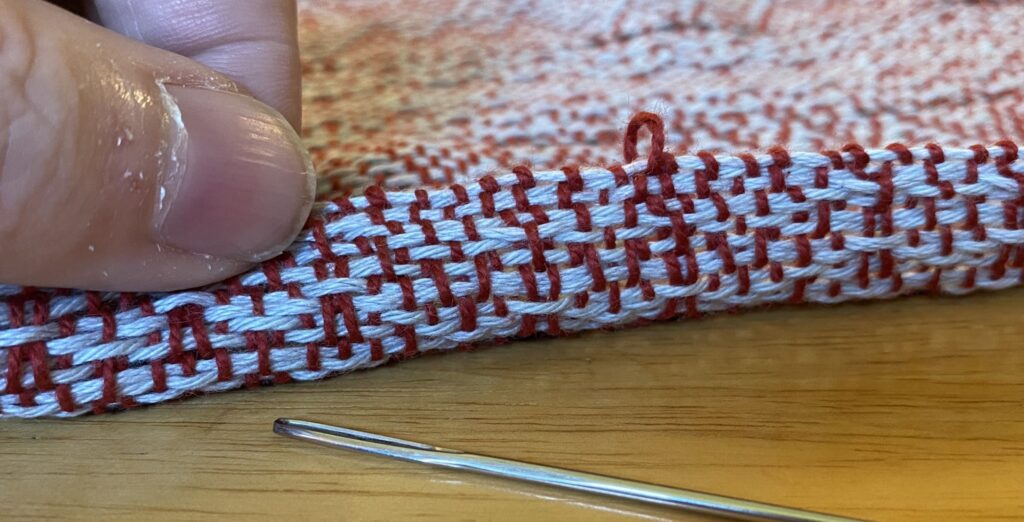
When the loop is very large
When the loop is large enough that you can thread it onto a needle, it’s very easy to fix. Just follow these steps:
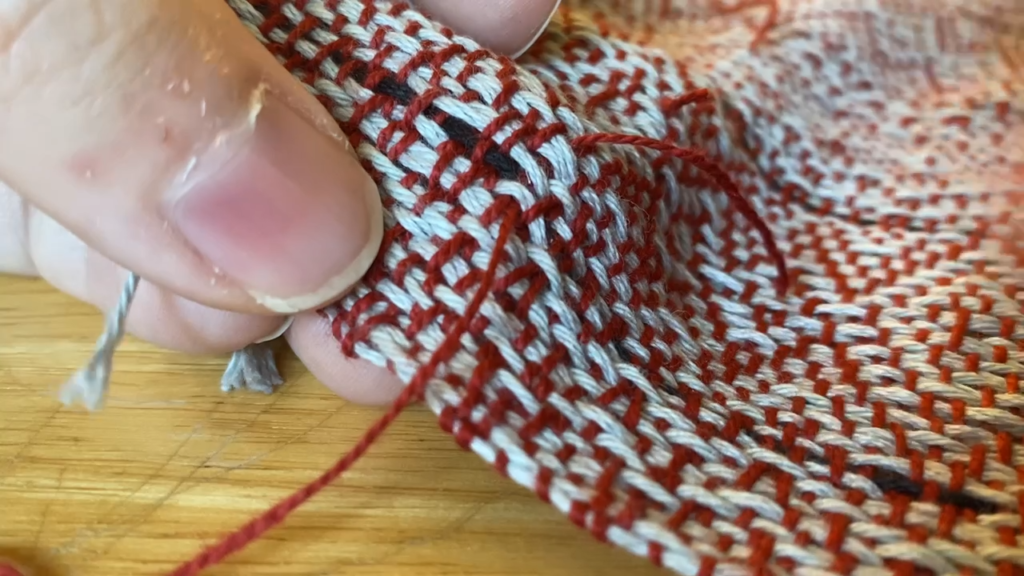
1. Use a large, blunt tipped needle (or the eye end of a finer or sharper needle) to pull the loop up inside the fabric rather than at the selvage. Adjust the thread so that the bend at the selvage looks good.
2. Snip the loop, near one end rather than in the middle. Leave most of the extra length attached to the end nearest to the selvage, so that you can sew it further into the fabric.
3. Thread the long end onto a needle and sew it through the fabric, following the path of the thread it used to be connected to. This will create an overlapped area with two threads through the same shed, just like when you join bobbins. The length of the overlap doesn’t need to be very long – aim for the same length you’d have used if you’d joined a bobbin.
4. Trim the longer end if necessary so that it doesn’t get caught during wet finishing.
All done!
When the loop isn’t quite long enough
If the loop is long enough to create an overlap and leave tails that will be secure during wet finishing but not long enough to thread onto the needle to sew back into the fabric, you can still use this method.
Rather than threading the needle first, sew the unthreaded needle through the fabric along the intended path, leaving the eye end sticking out just a little. Then thread the eye of the needle with the weft thread and pull it through the fabric.
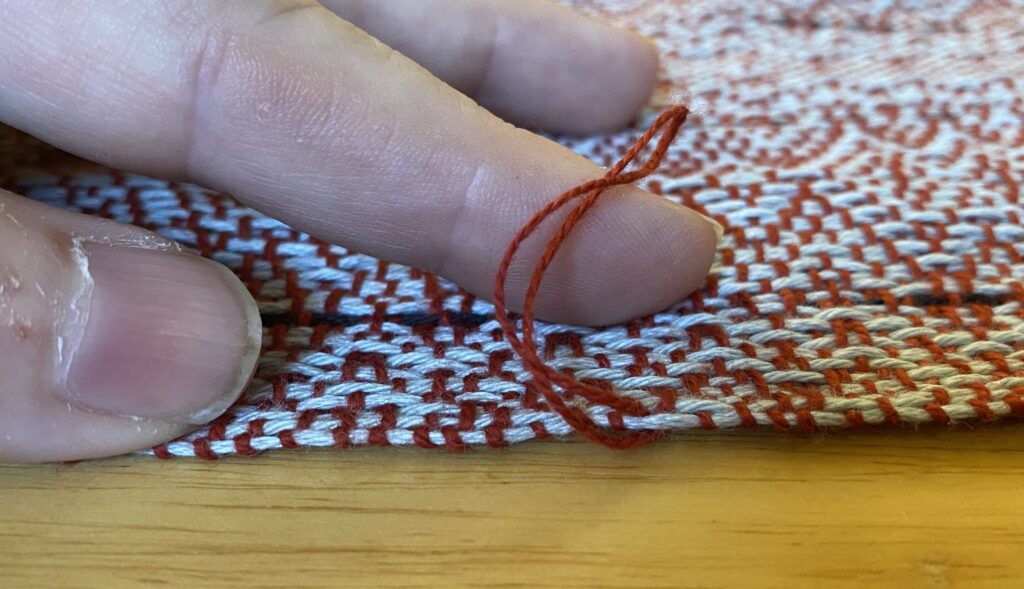
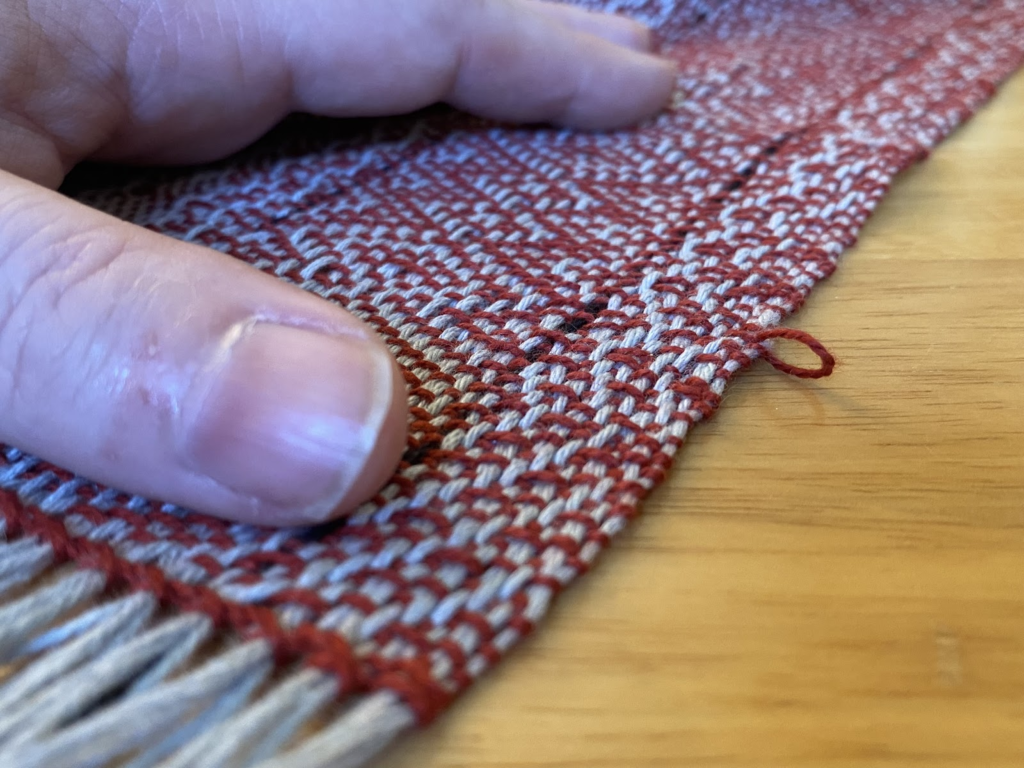
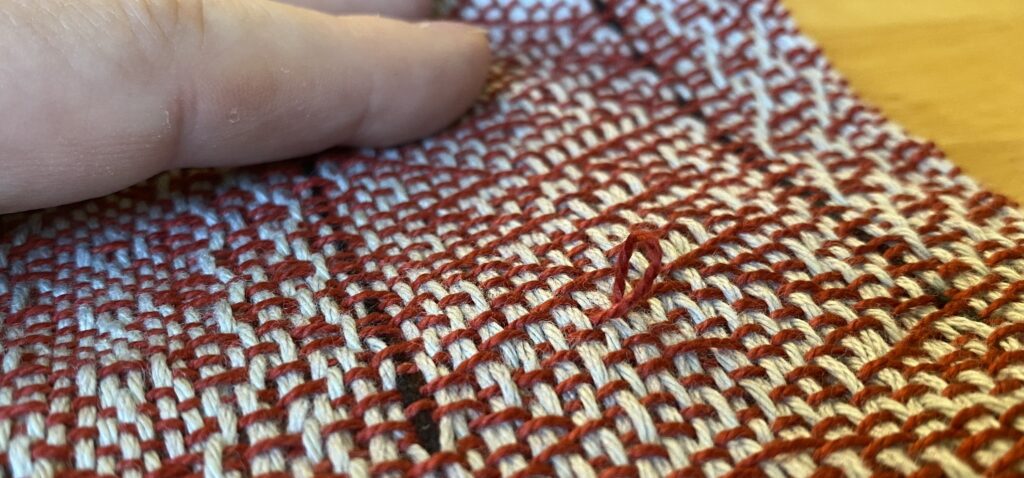
When the loop is very small
When the loop is very small, you can simply ease the extra length along one or both of the connected picks, distributing small amounts of the slack across the fabric.
Here’s a video (without any audio) that demonstrates this maneuver:
Notice that I eased the length along one pick, then went back, pulled some extra slack near the selvage back out into a loop and worked it into the fabric along the second connected pick.
Don’t worry if there’s a tiny bit of puckering in the weft; that should sort itself out when you wet finish the fabric. If there’s obvious slack, keep easing it into the connected picks until it disappears.
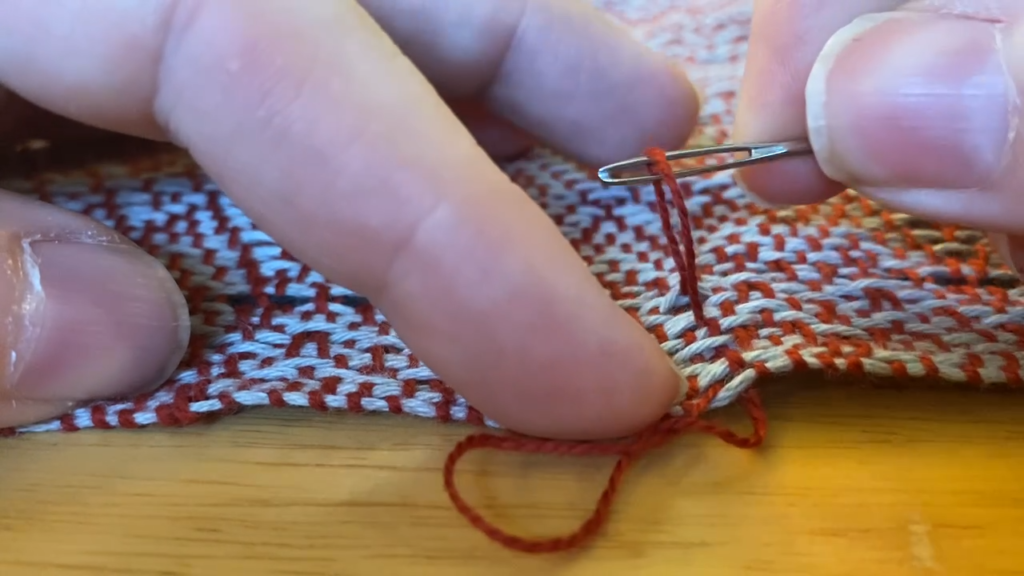
When the loop isn’t big enough or small enough
When the loop is too big to ease the slack in without it showing but too small to thread onto the needle or sew through the fabric, you’ll need an extra length of the same weft to fix things.
Here’s the process:
1. Start again by easing the loop into the middle of the fabric, away from the selvage.
2. Thread another length of the same weft thread onto your needle and sew it through the fabric following the same path as the weft pick with the loop. Start a few inches before the loop, go right past the loop as if it wasn’t there, and continue past the loom for a few more inches.
In the picture below, the loop is circled and the doubled threads are indicated with the yellow doodles:
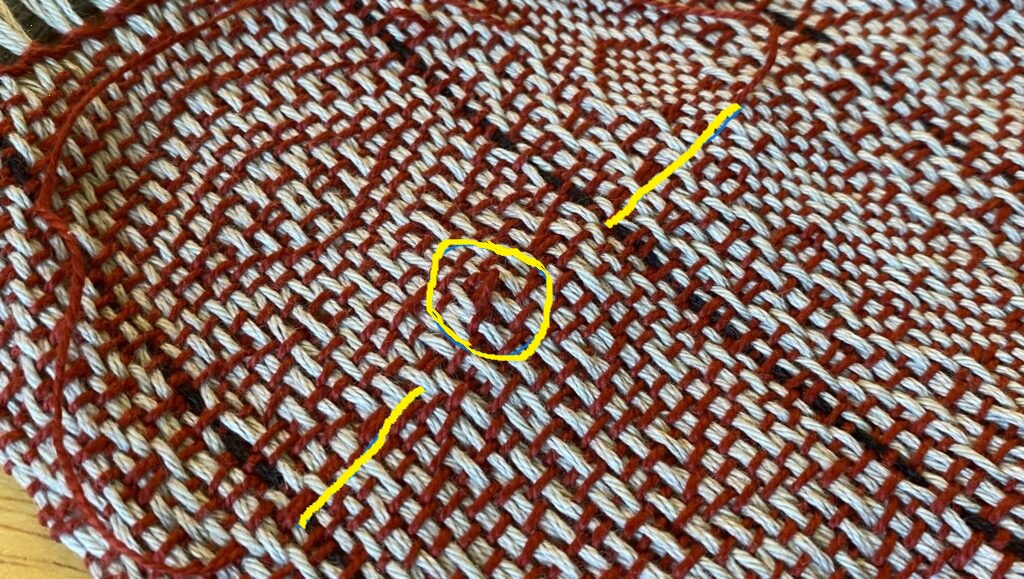
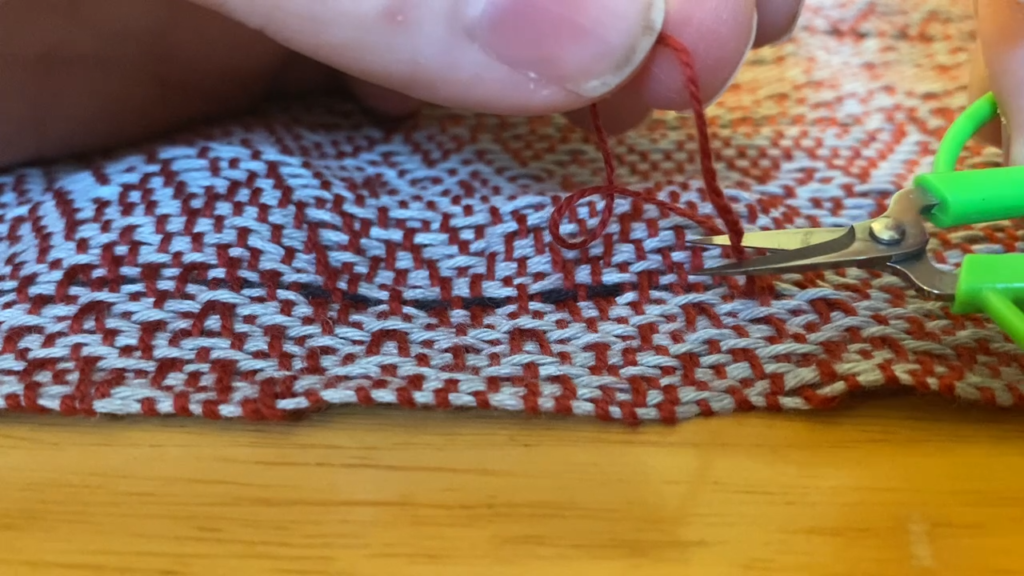
3. Snip the loop. Right in the middle is fine this time.
4. Use your needle to pull the cut ends of the loop back out of the fabric until the overlap between the original thread and the new thread you just added is an appropriate length. Do this for both ends of the cut loop.
At the end of this maneuver, you’ll have two overlaps and four loose ends. If necessary, trim the ends so that they won’t get caught during wet finishing.
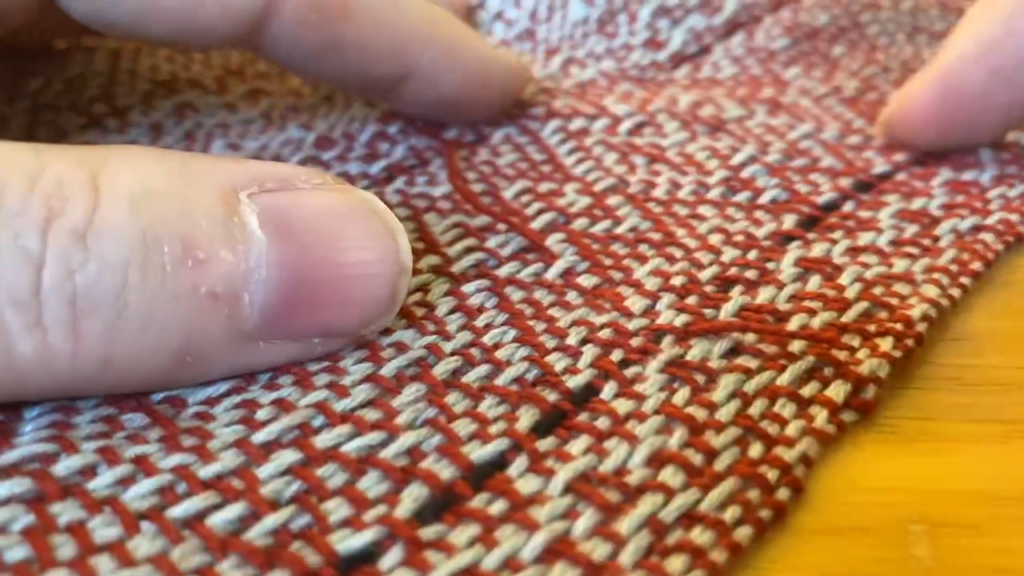
There you have it: no more pesky selvage loops, no matter what size they were in the beginning!

For more tips and tricks to make your weaving better, members have full access to our Weavers’ ToolBox.