
This blog was written by Sue Willingham.
Each year, about this time, I’m preparing the looms in my studio for a three day class that Janet and I call “Towelapalooza”. All ten looms in my studio are pre-warped with ten different drafts, checked, and ready to weave on when folks arrive. Since we have up to 20 people weaving on them plus Janet and me, the warps are LONG. At least long for me! They usually range between 15 and 18 yards but one year we put 30 yards on each loom.
When beaming warps this long, keeping good tension is critical, especially since we have lots of folks weaving on them. That’s where my trapeze comes in. I first learned about this technique from Laura Fry, although my equipment is different than hers. I needed a trapeze that I could move around, use on several different brands and sizes of loom, and I needed to make it myself. I hadn’t seen any being made commercially, but I have seen many inventive weavers making their own versions, with the materials and skills available to them. They all work fine.
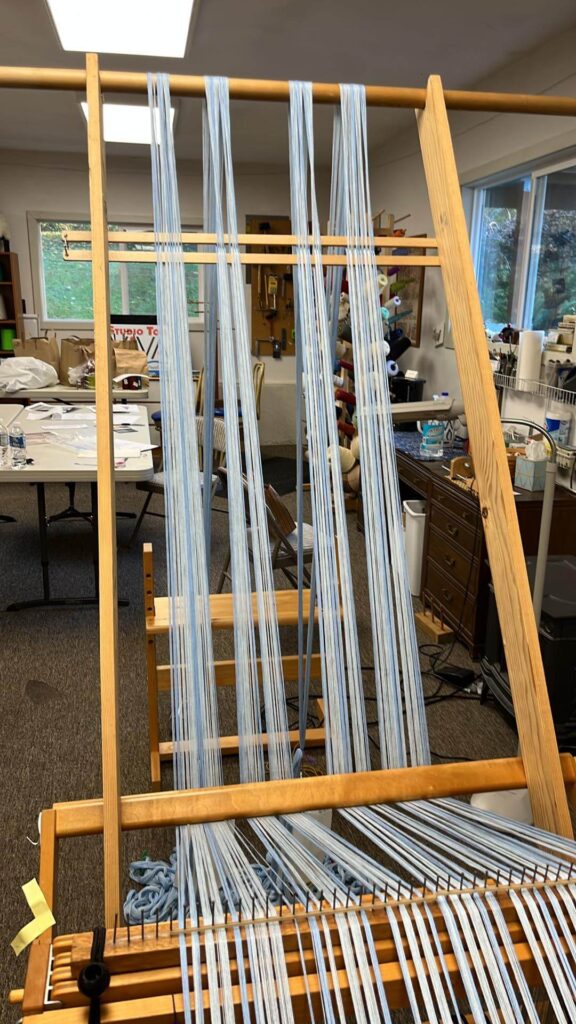
My trapeze is simple – just two six foot long pieces of 1×4 and a fat round “closet” dowel, which is longer than my biggest loom is wide. I had the store make a 30 degree cut off the bottom of the wood and a notch in the top. The wood pieces go over the front beam and down into the loom, where they are braced against whatever that loom has to brace it against; the angle cut helps it sit pretty much flat on the floor. The dowel goes across the top, resting in the notches.
When I am ready to use my trapeze, I collect the following supplies:
- Loops of strong twine about three inches long when doubled and the ends tied together, another set that is about six feet long, with knots at about two foot intervals. lease sticks a bit wider than the warp
- half gallon milk jugs with handles
- S hooks
I put water in the jugs for weight. It’s easy to make them all the same – eyeballing the water level is sufficient although using a scale is another way to even them up.
The warp is puddled on the floor, then goes over the dowel that is placed in the notches at the top of the 1x4s, then under the front beam.
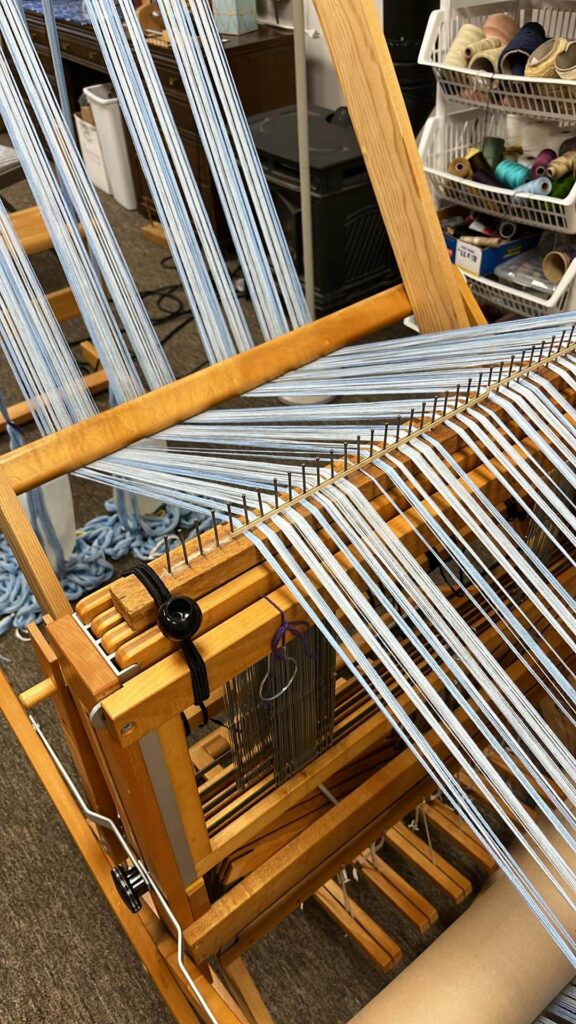
It is then routed through the raddle (which can be placed in the beater or on top of the castle, depending on the loom), and the back apron rod is inserted through the end loops, and secured to the warp beam.
I put one of the short loops of twine around each bout of the warp about two feet off the floor, tucking one end of the loop through the other and pulling tight. Then an S hook is placed in the loop and through the handle of the jug.
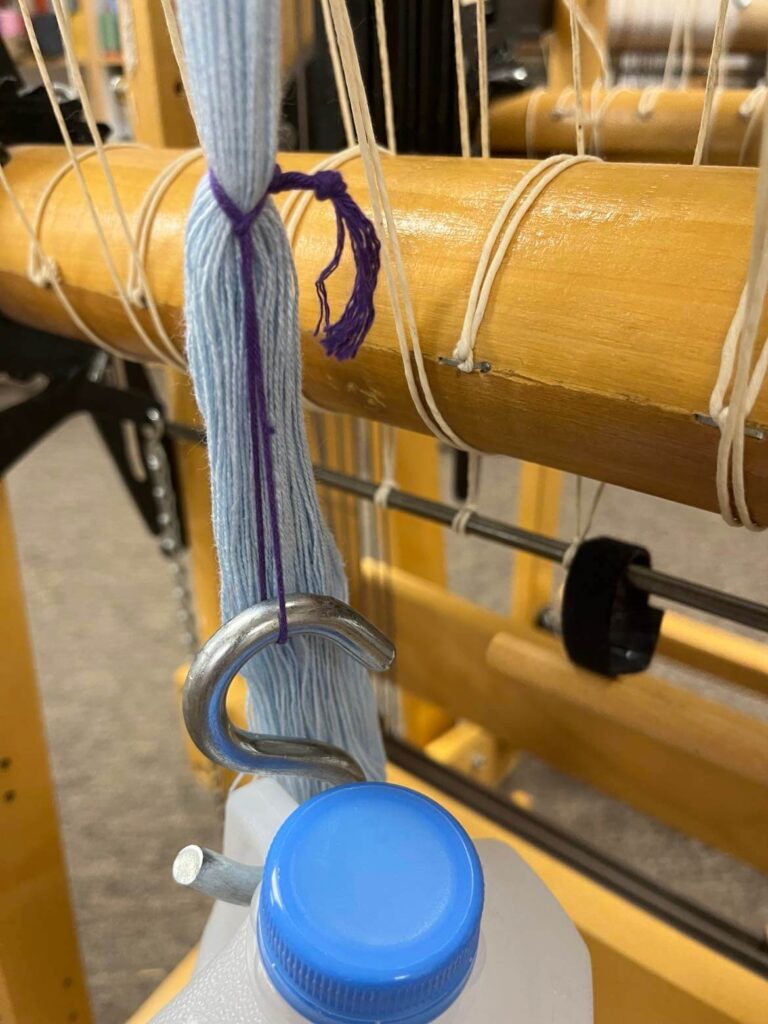
The goal is to hang the jugs as close to the floor as possible without sitting on the floor. The remainder of the chained warp just lays on the floor, waiting to be needed.
I warp back to front with the raddle in the beater, so I push the beater against the castle, and move the lease sticks so they are located as close to the trapeze dowel as I can. Then I’m ready to beam.
I can do this by myself but it is so much faster and easier with a helper. Janet’s non-weaver sister has been helping me and is very efficient at lining up the packing paper and turning the crank while I press on the brake, and tend the lease sticks, watching for any tangles or snags.
As the warp is wound onto the warp beam, the jugs move from their original position, going along for the ride with the warp, until they get ALMOST to the dowel.
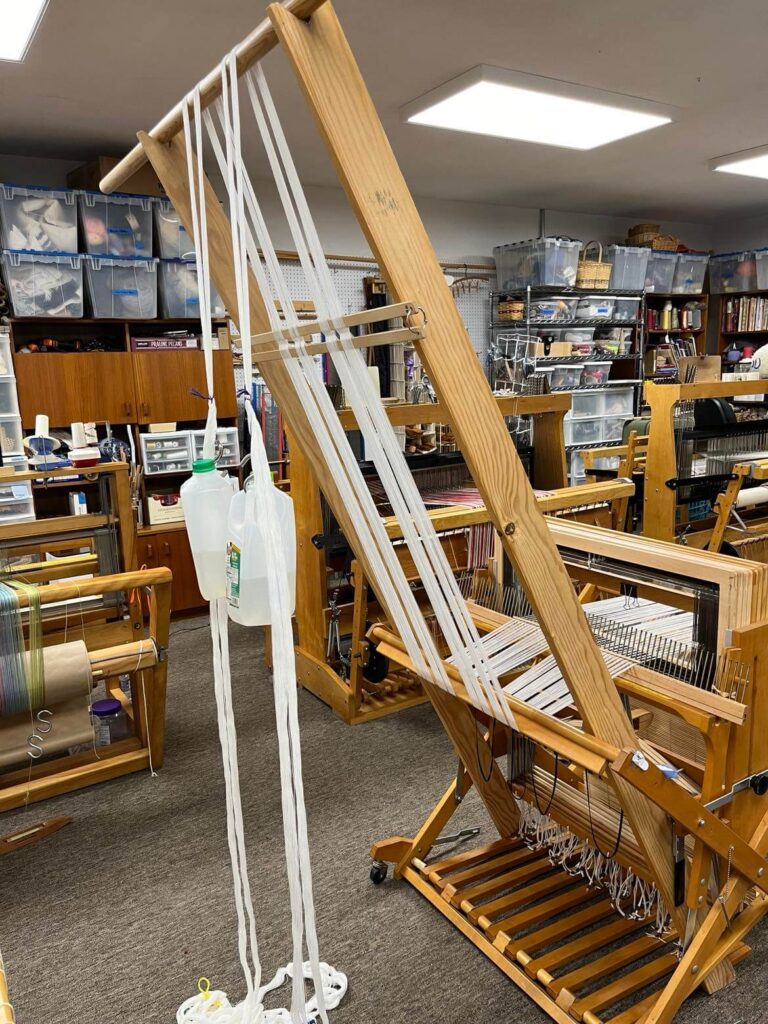
When they reach that point, I remove the jug from each bout and move the shorter twine loops down the warp, until they are positioned in such a way that the jugs are now back in their original position, almost touching the floor.
When the end of the warp is at least two feet off the floor, I use the long loops with knots instead of the short loops, attach them to the warp about six inches abovethe warp ends, and hook the jugs above a knot that provides tension without hitting the floor. Then, as the warp is wound on, I can move the jugs to a lower knot until – finally! – there is no more twine.
The jugs are then detached from the warp, and the trapeze and raddle are removed.
I then move the lease sticks along the warp, under the front beam and to the back of the loom, so they are positioned between the castle of the loom and the back beam, and I’m ready to thread.
With a bit of practice, we have become pretty efficient with this method, and beaming a warp that is roughly 15 yards long takes less time than to thread it!
I hope that you try this method, and that you share how it goes.