
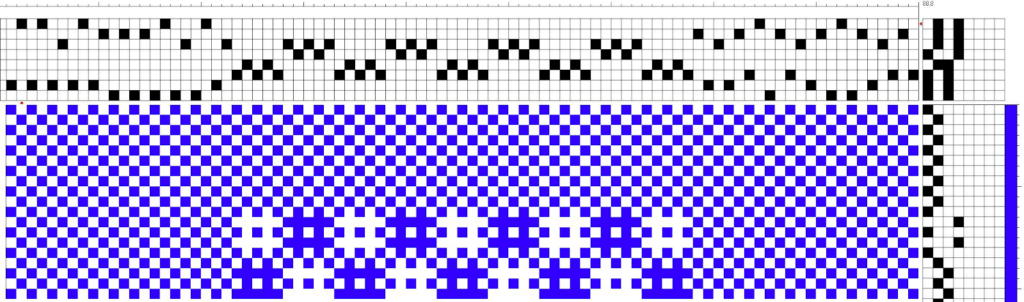
A question came up in a Facebook group from a weaver who wanted to use a huck threading like this…
…but she didn’t have enough heddles on Shafts 1 and 4.
If she was working with a four shaft loom, she would be limited to either moving heddles, or adding repair heddles to Shafts 1 and 4.
However, in this case, the weaver did have an eight shaft loom, and wondered about how to move some of the plain weave threads onto the extra shafts so that she didn’t need to move heddles.
The usual answer: new shafts behind
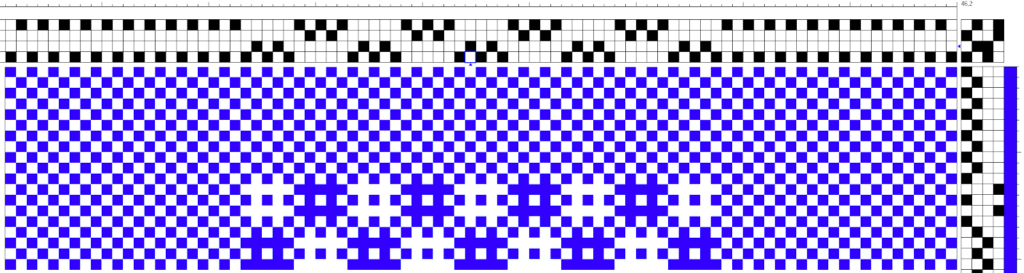
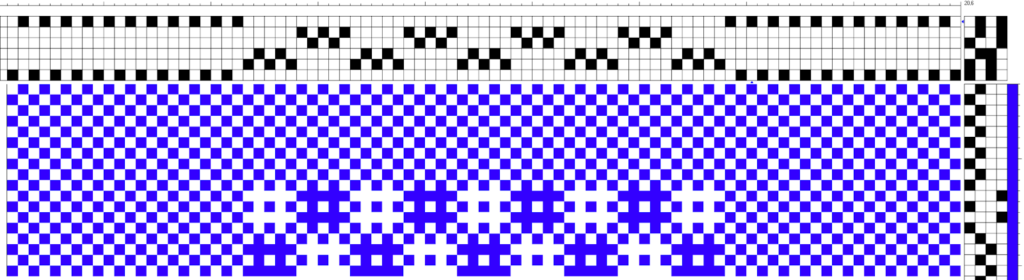
One option is to simply treat the back four shafts as a duplicate of the front four, so that Shaft 5 is just like Shaft 1, Shaft 6 is just like Shaft 2, etc. Then when you run out of heddles on Shaft 1 you can start using the ones on 5 instead. That means you need to tie-up Shaft 5 just like Shaft 1, Shaft 6 just like Shaft 2, etc.
Here the left border is moved back onto Shafts 5-8, and the tie-up for Shafts 1-4 is copied to Shafts 5-8.

This does work, and it’s a good enough solution if you’ve already started threading and only discover later that you’re running out of heddles. (This version doesn’t use Shafts 6 & 7 at all, so you could leave them out entirely and make this a six shaft threading.)
That’s all well and good but if you’re adjusting your threading in advance, there’s a smarter choice.
A different choice: new shafts behind and in front
Instead of duplicating the front shafts on the back, you can still add two new shafts for the plain weave, but add one in front of the original threading and one of them behind. (In Fiberworks, you’d change the number of shafts to 6 and then use the Shaft Shuffler tool to move one of those new, empty shafts down to Shaft 1).
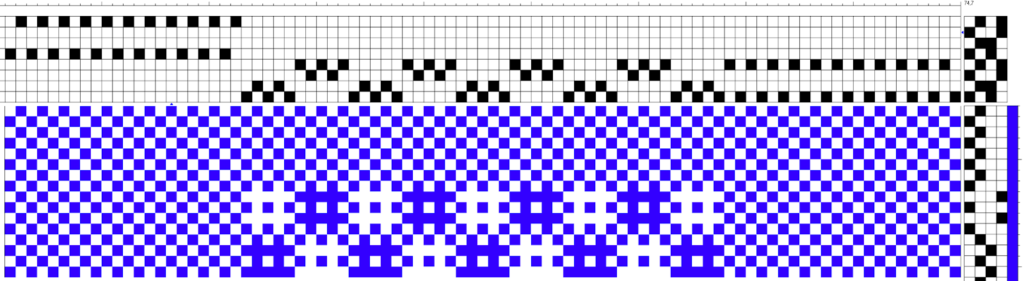
That puts all the threads on Shafts 2-5, like this:
If you copy the tie-up from what’s now Shaft 2 down to Shaft 1, then any thread that’s currently on 2 can go on 1 instead without changing the structure at all:
That looks like a mess and I wouldn’t recommend threading this way – it’s just to show you that Shafts 1 and Shafts 2 are interchangeable and you can move the warp threads back and forth between them without messing up the cloth.
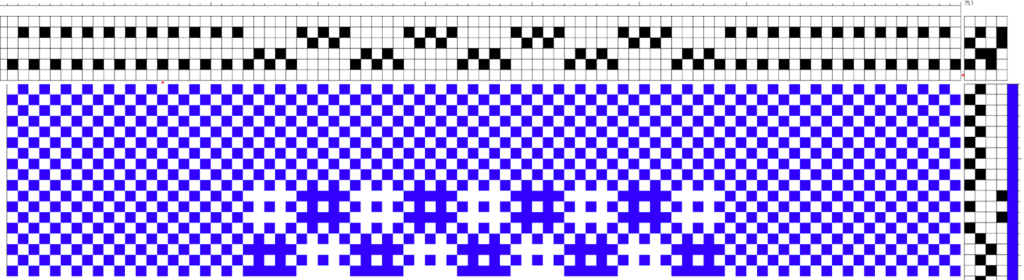
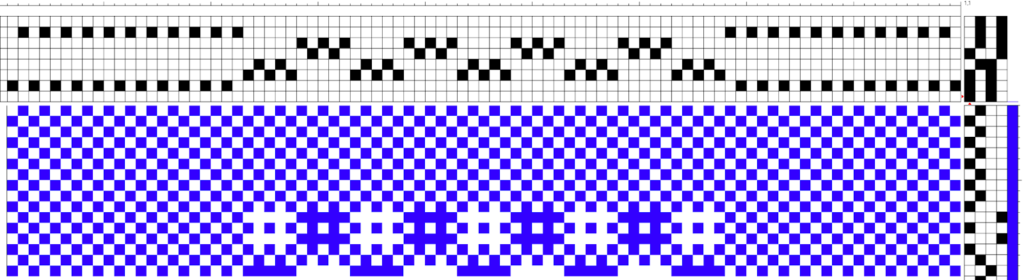
A more logical choice would be to move the threads from the plain weave borders to Shaft 1 and to leave the ones in the huck units on Shaft 2:
Incidentally, you can tell that Shafts 1 and 2 are interchangeable because they’re tied to exactly the same treadles. If you opened this .wif in the Draft Editor, it would offer to compact the threading to fewer shafts.
Now do the same trick with Shafts 5 and 6: first, copy the tie-up from Shaft 5 to Shaft 6, then move the border threads from 5 up to 6:
Why is this better?
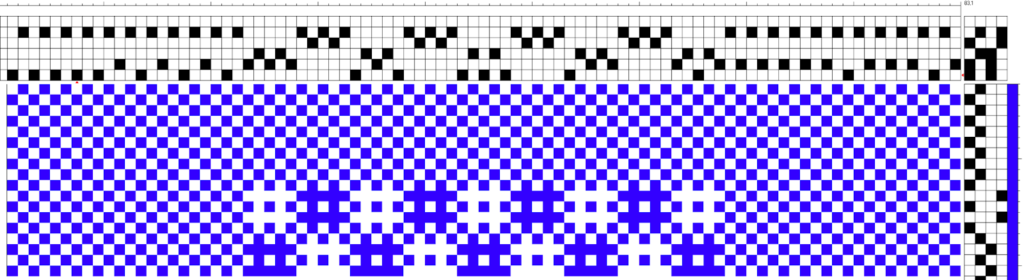
Well, for one thing it puts the plain weave borders on Shafts 1 and 6 and all the huck on Shafts 2-5. Giving shafts separate jobs to do makes it easier to understand the threading and the tie-up and makes your threading more flexible. The original suggestion on 8 shafts had both the plain weave borders and the huck units on Shafts 1 and 4.
There’s another reason, too, though: it keeps the shafts that make up each plain weave shed closer together and more consistent, which means that the bottoms and tops of those sheds will be more even.
Think about the original idea of moving some of the plain weave threads back to Shafts 5-8:
The bottom of one of the plain weave sheds will be made up of threads on Shafts 1 and 3 in the middle and on the right side, but when you get to the left border it will suddenly jump up to Shaft 5. Chances are pretty good that the threads that form the bottom of the shed will be slightly higher or lower at that point, forming a step up or down. That’s especially true if you happen to have different heddles on your back shafts, as often happens when you add new heddles to an old loom.
If there’s a step in the shed, then every time your shuttle goes over it there’s a chance it’ll hop. A shuttle that hops can go over threads it shouldn’t. A shuttle that hops often dives right after, and a shuttle that dives tends to drop down through the warp and wind up on the floor.
The same step, hop, and dive issue is true for the other plain weave shed as well.
Spread across even more shafts
If the new threading still has too many heddles on Shafts 1 and 6 and you needed to distribute them onto more shafts, you could add another one in front and another one behind, once again duplicating the tie-up from the old shafts to the new ones:
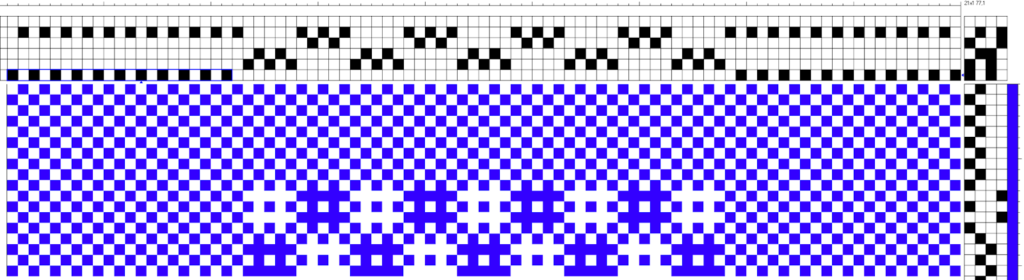
Now you can distribute the plain weave border threads across two shafts for each half of the shed:
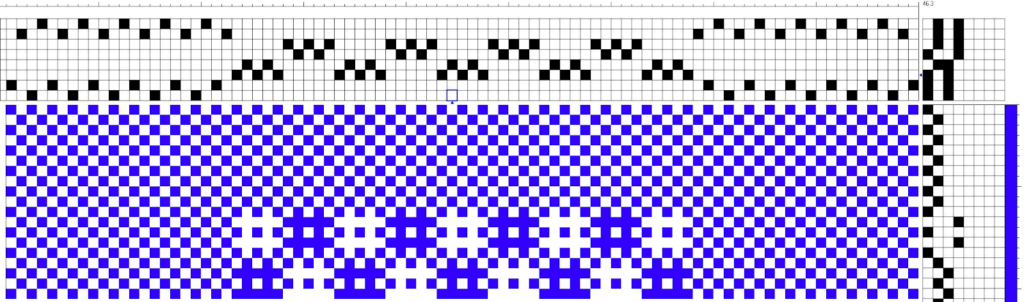
The threading and tie-up are still logical, and it’s still easy to see what part of the structure each shaft is responsible for. As well, your plain weave shaft combos in this case are still close together as they can be (S1,2,3,5 vs S4,6,7,8) so the thread angles will be closer to uniform and the sheds will be as clear as possible.
You can also see from the tie-up that Shafts 1, 2, and 3 are interchangeable, as are Shafts 6, 7, and 8, so if you grab the wrong heddle while threading, it won’t make a difference:
Again, I don’t recommend threading in this chaotic order. As you can see, though, as long as you get those front plain weave border ends on any one of Shafts 1-3 and the back plain weave border ends on any one of Shafts 6-8, your plain weave will work out.

If you would like to learn more about drafting, reading drafts, and how to alter drafts, you might like these classes in The Handweaving Academy: The Threading: Where Every Draft Begins; and Drafts: The Written Language of Weaving.