
Here is a little bit of weaving trivia for you; when does one plus one equal one?
This seems impossible, based on what we’re taught in grade school. However, one plus one DOES equal one when you are talking about warps and tying a new warp onto an old one.
There are many reasons to do this – and, if I’m being truthful, just as many not to.
I have chosen both ways, many times.
For a project I did a while ago, I chose to tie onto the old warp. The biggest reason I made that choice is because the two warps were going to be woven with the same threading. If the projects had had different threadings, I would not have chosen to tie on.
When I put the original warp on, I threaded it carefully, checking along the way for mistakes. Then I sleyed the reed, checking again for threading mistakes. Once that was done and I had even tension on the warp, I wove a few repeats of the pattern, using a weft that contrasted highly with the colours of the warp. This allowed me to…..you guessed it, check for mistakes. Once I carefully inspected the weaving, and was satisfied that I had found and fixed any errors, I switched wefts, and settled right into my weaving rhythm.
That process of threading, checking, sleying, checking, tensioning, checking, weaving, and checking AGAIN, all takes time: approximately 4-6 hours, depending on how complex the threading is, and how many mistakes I find and fix.
The process of tying on is relatively simple. When you finish weaving the fabric for a project, you decide if you want to tie on to the old warp at the front of the loom or at the back based on your preference of dressing the loom F2B or B2F. Then you cut the old warp in the desired location, get the new warp in place, and start tying one thread of the old to one thread of the new.
Sort of.
Of course, nothing is REALLY that simple. Tying on can be an interesting exercise in keeping the threads of not only one, but TWO warps in the correct order. Sometimes the order matters very much, other times not so much, so you have to decide the appropriate level of attention that should be paid to the thread orders.
Then you need to consider your knots. Overhand? Surgeon’s knot? Weaver’s knot? Many people choose the weavers knot for this purpose. It is a strong knot that is strong and relatively quick to tie. Best of all, it doesn’t need long tails sticking out to keep its strength. (You should google YouTube videos of these knots, but only if you have a ridiculous amount of time, because it is a bit of a wormhole.) Keeping the tails of a knot short is important in this case, as long tails can effectively attach a thread to the one (or more) next to it, and cause all kinds of headaches. I chose to go with a weaver’s knot, because that is my favourite. Once the knot is decided, you might want to practice it a few times, so you are comfortable using it.
Then you set the warps up in a way that works for you, keeping in mind that you need to reach both warps easily, and might need to keep careful track of the thread order of one, or both warps. Then you tie the first end of the old warp to the first end of the new one. Then you tie the second end of the old warp to the second end of the new one, then do the third end of each, etc. My project had 720 ends in each warp, so I’d tied 720 knots by the time I was done.
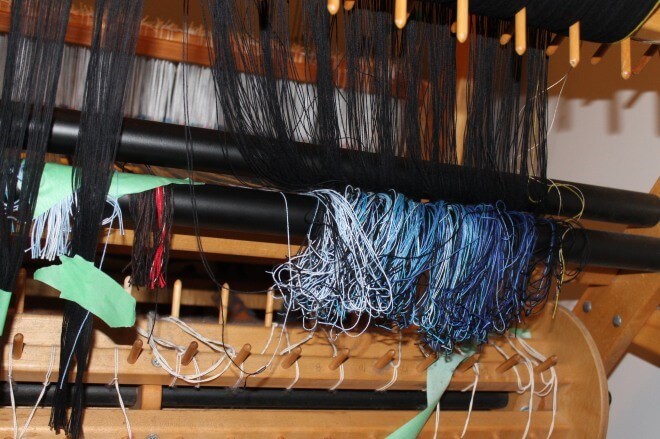
Once the knots are tied, you look at the giant mess of seemingly hopelessly tangled yarns, take a deep breath, cross your fingers, (and eyes, toes, and anything else that is available for crossing), and dress the loom with the two warps that are now, hopefully, united into one.
Here is my tangled mess part way through – I still had about two more hours of knot tying to go:
After all of that, you might wonder why I decided to tie on rather than start fresh.
In this case, I KNEW that my old warp was threaded and sleyed without error. So, roughly 5 hours of knot tying seemed like an even trade for roughly 5 hours of threading and sleying. However, I knew I’d also save the time spent finding and fixing those sneaky little errors that tend to creep into warps while threading and sleying, so my five hours of knot tying were less than the total time it would have taken to start from scratch..
Add in the fact that the new warp was a solid colour, so I didn’t have to pay TOO much attention to which thread of the old warp attaches to which thread of the new warp, and making the choice to tie on was pretty easy to make.
I finished tying alllllll the knots and checked them carefully to ensure that they were tied properly so I was sure that they wouldn’t slip when I put tension on them.
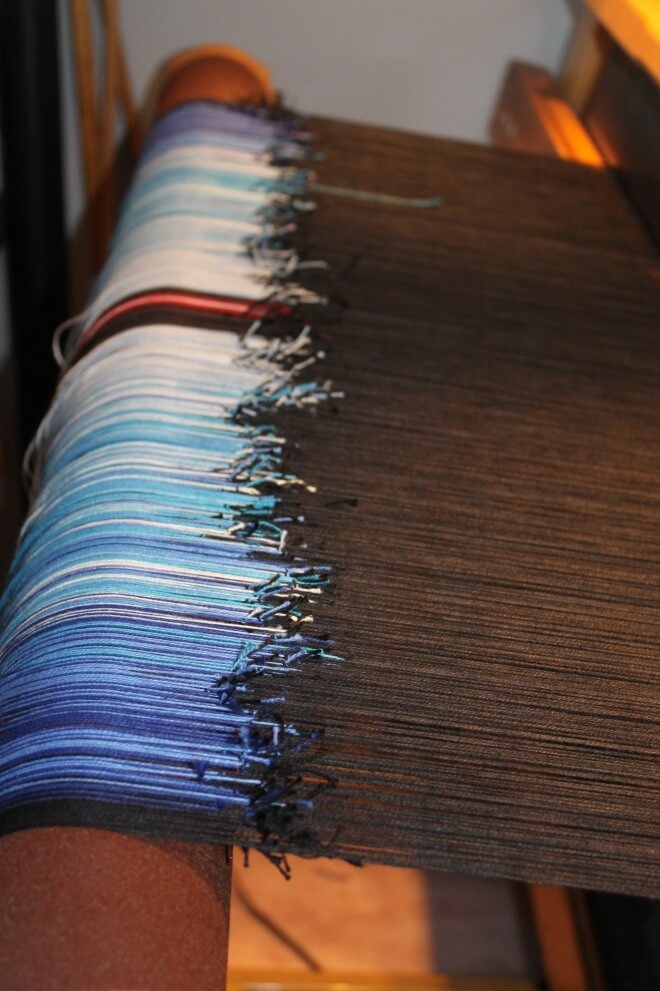
The big moment arrived, and I carefully worked all those knots through the heddles and the reed (I am working on my AVL loom with a sectional beam, which I usually beam back to front) and added tension to the warp.
At this point, I was ready to weave with the new warp, and that is always an exciting thing! I really love how all the knots look here, almost like a sound wave:
So… I replaced the time that I would normally spend threading and sleying with the time spent tying a gazillion knots, but doing that meant that I didn’t have to take any time looking for, finding, and correcting threading and sleying errors. This is a win in my book.
The next time you finish up a warp, and think “Oh, I really want to weave more things with that same threading”, try tying a new warp to the old.

From the Course Catalog:
Drafts: The Written Language of Weaving – Learn what a draft IS, what the parts of such a draft are, how drafts differ from project instructions, and how drafts represent the loom itself
Designing in the tie – up: Clocks and Cookies – Dive into all the nitty gritty detail to help you harness the potential of a straight threading and treadling by altering the tie – up.