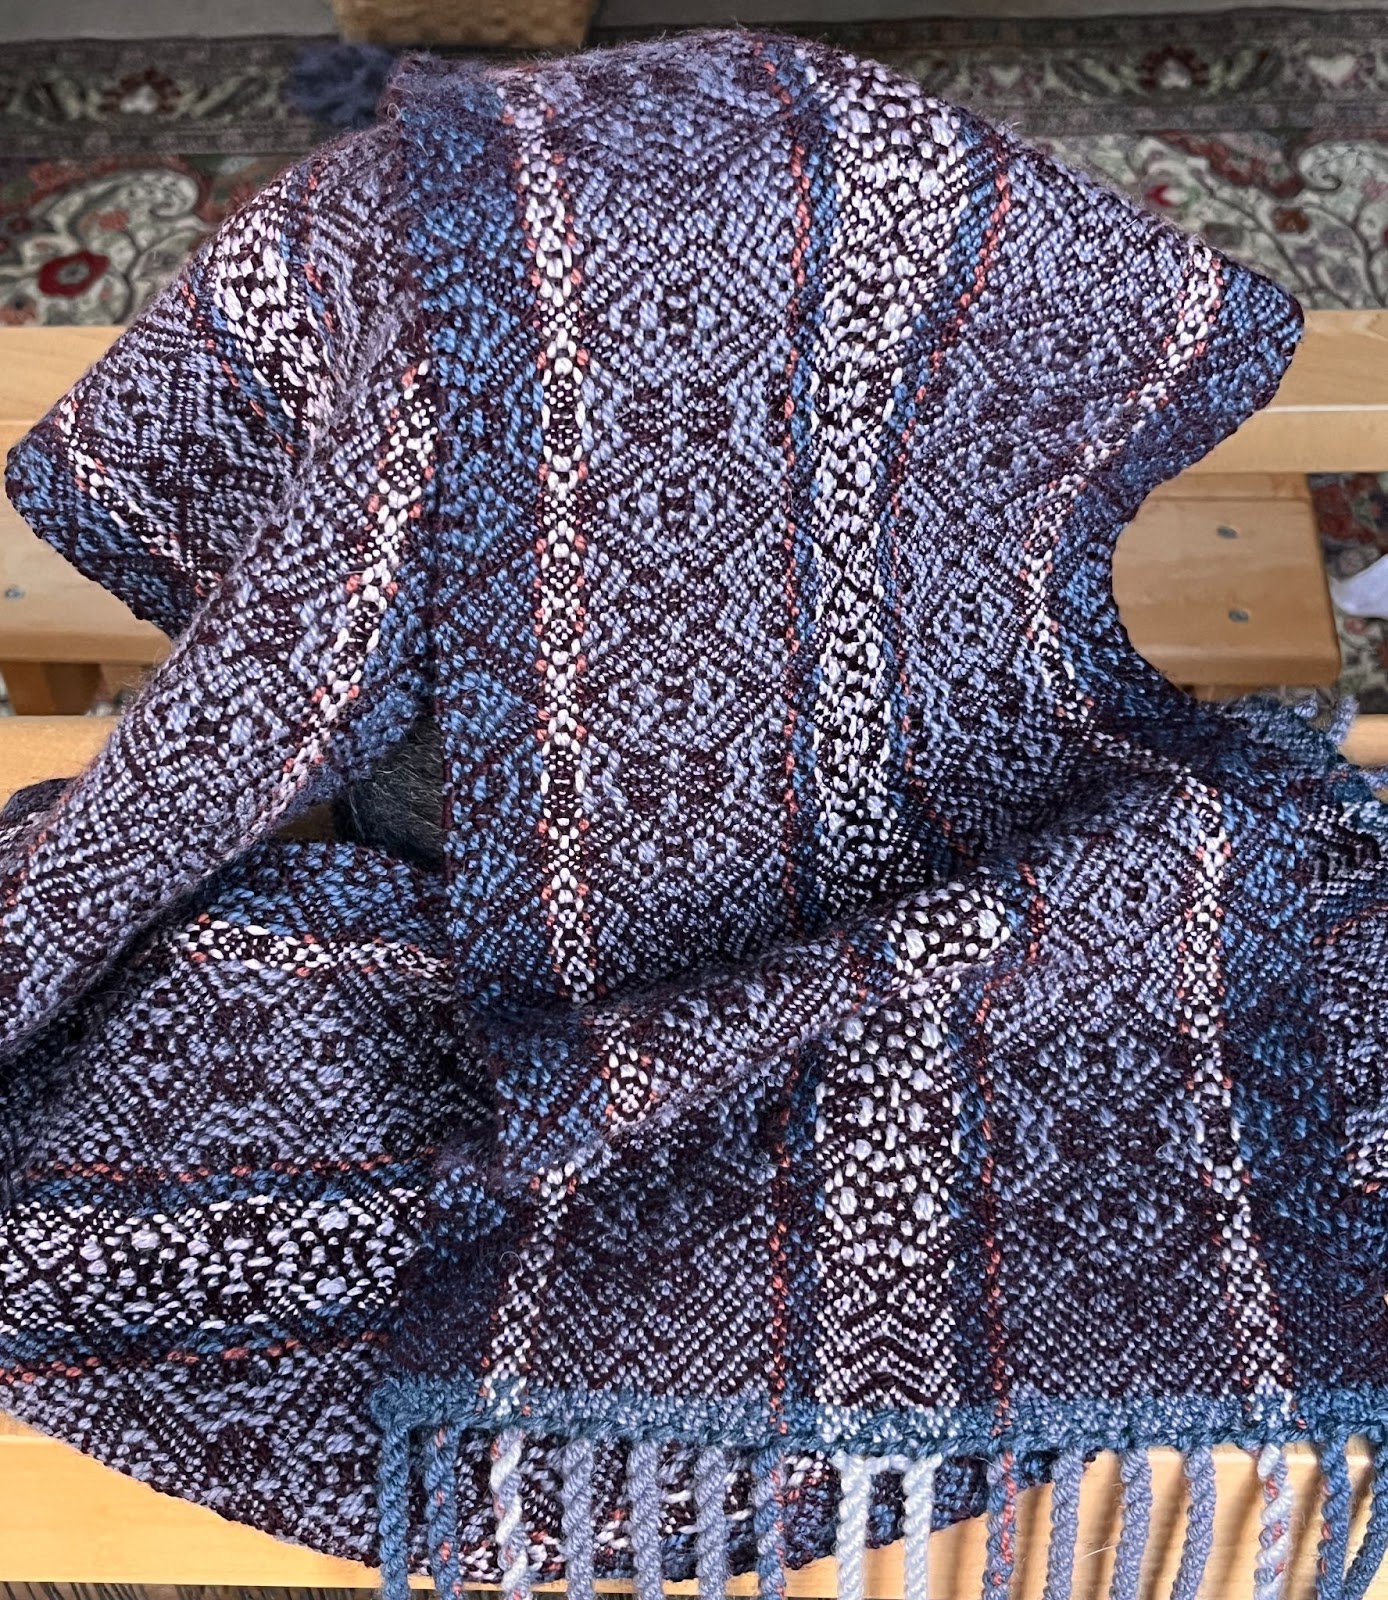
Today we have a guest blogger, Handweaving Academy member Miriam Lebby, telling the story of how she designed and created her beautiful scarf. Read on to find out how one Academy member is using what she learned!

As a long-time weaver on 4 shafts, I was fairly comfortable planning and designing my own projects using basic twills and familiar colors. Then I decided to get an 8 shaft loom, and I felt like a beginner weaver! Taking the Designing in the Tie-Up class opened up a new understanding of how weave structures work. Then, the mystery of angles, undulating, and advancing twills was unlocked. Along the way, I learned about value, hue, saturation, stripes, and MAGIC.
As I was working my way through the exercises in the twill classes, the twill gamp class was released. At heart, I am a lazy weaver, so I thought “ why not skip the rest of the exercises in the angles, undulating, and advancing twill classes and just make the twill gamp?”. As I began playing around on the Draft Editor and Fiberworks, Stripes + Drafts = Magic was released. I thought “why not add color to the gamp and see what happens?”. So began my journey from Gamp to Scarf.
My design process for this project began with determining the weave structure and then adding color. I knew how wide I needed my warp, but I needed to decide the size of each structure and the best way to link them together. I used Fiberworks and the Draft Editor to design half of the draft. In the past, I would have tried to edit the whole project manually, but now that I know how to use the copy, paste, and flip feature in the Draft Editor, it is easy to make both sides match.

Next, I moved on to the Color Editor. First, I played around with the design details I wanted to highlight. Then I played and played and played! I love using the Color Editor and can spend hours just changing the color placement.


Finally, I was ready to get to the loom and see if the computer vision matched reality with the color and design. Winding and warping went smoothly. I always add 12-20” extra onto a warp to sample colors and treadling, check my sett, and practice my beat.
Since the threading was complicated, I knew the tromp-as-writ section would be slow weaving. I write threading sequences on strips of masking tape, which I put on my beater bar. That’s a tip I learned from someone in the discussion forums at the Handweaving Academy.
After I finished the gamp, I needed a brain break from twills and complex weaving. I needed to make a scarf as a gift and was ready to try something completely different. I wanted to just find a scarf draft and create something without too much thinking.
So I chose a draft from Handwoven magazine, wound the warp, started weaving, and just hated it! I don’t usually cut off a warp, but that is what I did. I was running out of time to finish the scarf. Then I remembered all the work I invested in my gamp and thought, “Why not take a piece of the gamp and use it for the scarf?”.
So back to Fiberworks and the Draft Editor and stash yarn. I was limited in my choice of color with my stash yarns, some possibly dating back 30 years. How would they work together?


My time was running out, so I needed to just do it. As I was winding my warp I ran out of the main yarn color with 2 inches to go. I found a different yarn and a new color and wound off the end of the warp. Then, I made a separate chain for the beginning of the warp. So as I was putting the warp on the loom, I needed to remove the first 2” of yarn and add in the new color. All went smoothly.
Since I was playing “yarn chicken,” I didn’t have a lot of extra warp to sample with. I tried out a couple of weft colors, then started weaving. Eight inches into weaving, I shook my head and wondered what was I thinking – I don’t have enough of this yarn for the whole scarf! I found a color I thought looked better, but it was a little on the purple side, which was not a color the gift receiver liked. I used it anyway because I loved it. The weaving was slow because the treadling was complex, but the tension worked well, even with all of my different yarns. Despite all of the mishaps along the way, I loved the final scarf.

Did I mention that I loved it so much I gifted it to myself and gave the person a scarf from my stash?

Both the gamp and scarf projects took a lot of time, but I loved that I could put into practice many of the lessons from the different twill classes, design classes, and color classes. When I look back at my designs and projects from 2 years ago and what I am making now, I see the growth in all areas of my weaving. Thank you, Handweaving Academy!
Thank you Miriam for sharing your wonderful project!
From the Course Catalog:

Designing in the tie up-Cookies and Clocks – Anything you can doodle in a tie up can appear in your cloth

Stripes + Drafts= Magic – Transform a draft using color alone
