
Our latest course, the Stash Weave-along, has detailed instructions for creating a scarf warp entirely out of leftover bobbins, odd balls, and other bits and bobs from your stash – including several different “recipes” that you can use to design a twill threading and stripe order in advance.
Twill is not your only choice for threading a stash warp, however! Plain weave is another excellent choice for stash warps and will
- Showcase a variety of sizes or textures,
- Emphasize the yarns and colors rather than the structure, and
- Simplify threading and weaving.
Best of all, since there’s no need to coordinate the threading with stripes, plain weave gives you maximum flexibility for color and yarn order, which opens up new possibilities for designing your stripes right at the loom.
One such option is designing in the reed, which allows you to design your stripes entirely at the loom without any advance planning at all. A second is stealing from the neighbours, which allows you to wind solid, homogenous stripes on the warping board, but then change the transitions between those stripes at the loom to make them more gradual and/or random.
Designing in the reed [front to back]
If you dress your loom from front to back, you can use a technique called “designing in the reed,” which means waiting until you’re sleying the reed to decide exactly where individual threads will go. This works best when the warp length isn’t very long. A single scarf should be just fine!
Begin by winding each yarn as a separate chain, making each chain the desired length. Then measure out from the center of the reed to the edges of your warp and mark the selvage dents. For instance, if your warp will be 9” wide, center those 9” in the reed and mark the dents 4.5” to either side. Those are the boundaries of your warp, so don’t sley any threads outside those dents.
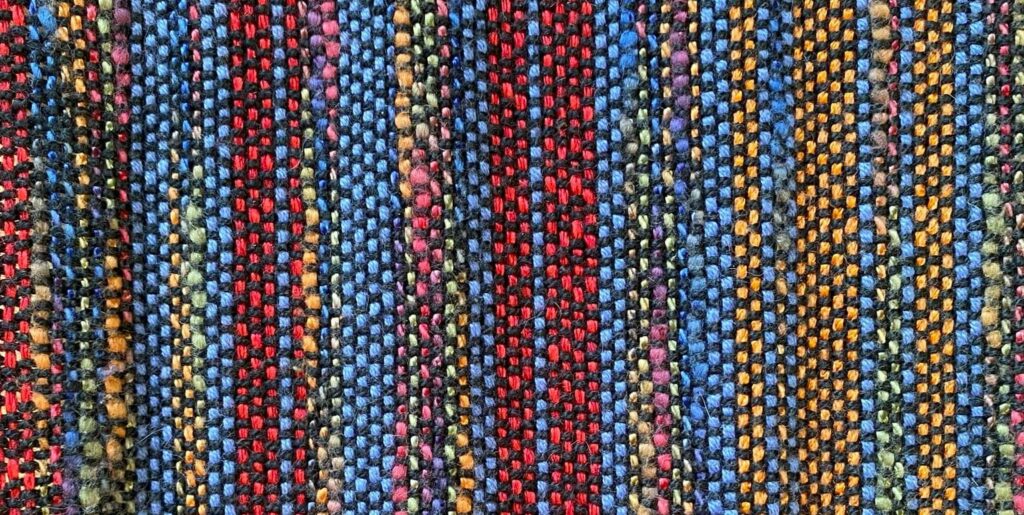
Next, take one of your warp chains and sley it through dents within those boundaries however you like. The threads don’t need to be side by side, but keep them in the same order in the reed as they are in the cross. Leave gaps between the ends in the chain to fit threads from other chains into. Be sure that any solid stripes you create out of this chain are sleyed appropriately for the yarn.
For example:
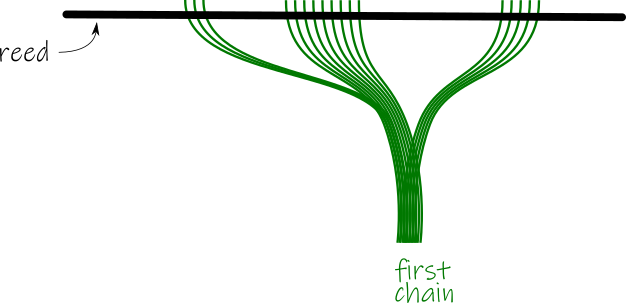
Then take a second chain and do the same thing, like so:
This new chain might be sleyed differently from the first if the yarn it’s wound out of is finer or thicker. Where a stripe of the new chain falls right next to a stripe of the old one, consider whether to add an end of the new chain into the same dent with one of the old, or if each should have their own dents.
Keep working with each chain, filling in some gaps and leaving others for future chains to fill in. The goal is to fill each of the dents between the marked selvage dents with threads by the time the last chain is sleyed.
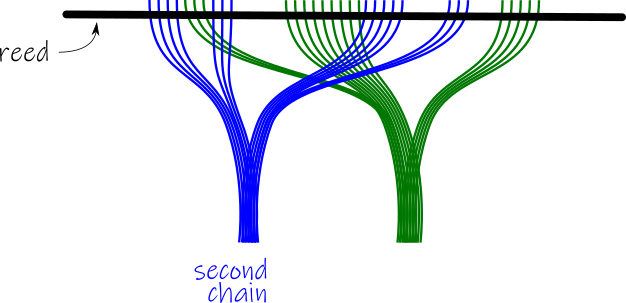
For example, here’s a complete warp of three different chains:
The diagram shows just one end per “dent” but that’s not how it has to be. If you’re working with fine yarn, you’ll probably want to sley more than one per dent in some places, either by putting multiple ends of the new chain into an empty dent, or by adding ends from the new chain to dents that already have threads from an earlier chain. When the yarn is thick, put fewer ends in each dent to avoid cramming them in too tightly. The idea is to even out the denting so that about the same overall “thickness” of yarn(s) winds up in each dent, but you don’t need to overthink this. Some variation in warp density will just add to the overall texture of the piece.
Once all the chains are sleyed, continue dressing the loom like normal. You might have some untangling to do as you beam the chains; that’s why I recommend using this technique with short warps!
Stealing from the neighbours [back to front]
Designing in the reed doesn’t work as well if you dress your loom from back to front, but you can still modify the transitions between one stripe and the next by “stealing from the neighbours.”
In this case, you wind a striped warp like usual, and beam it like usual. When it’s time to thread, however, you can leave one or more ends of a stripe unthreaded, to be used in a little while, or snitch ends from future stripes and thread them now. This could be as simple as swapping the last end or two of one stripe with the first end or two of the next, interleaving the last few ends of one stripe with the first few of the next, or you can get more daring. And, of course, you don’t need to treat all stripes the same way: you can leave some stripes solid and rearrange the edges of others.
When you leave a few ends unthreaded to use later, be sure to use them before too long so that they don’t cross over too many ends. Leave them hanging from the lease sticks for now so they stay within reach. When you’re ready to thread them, pull them out of the lease sticks first so that they travel straight from the back beam to the heddles without other threads getting in the way.
Likewise, if you snitch threads from future stripes early, don’t snitch from too far ahead and pull them out of the lease sticks before threading them so they don’t interfere with the rest of the threads in the cross. You might like to put them back through the lease sticks in their new position if that helps keep things more organized, but that isn’t a requirement.
Pulling threads away from where they were beamed and across other threads creates the potential for tension problems while weaving. The amount of risk depends on how well-behaved the threads are, and how far out of alignment they’re pulled so it’s a good idea to avoid crossing threads that are very textured very far away from their original path.
Note that the warp threads will no longer go through the cross and the heddles in the same order, so I don’t recommend keeping the lease sticks in the cross at the back of the loom while you weave. If you really want to keep them in, I’d remove them from the original cross once the warp is threaded and then reinsert them into the new cross.
To weave the fabric as plain weave, you can use a straight draw threading or just two shafts. You could also choose any threading that can weave plain weave to give you the most options for design and exploration on a single warp. For many, the joy of weaving is in the finished product and exploring the unknown. Designing a warp for plain weave with more complex stripes can give you the best of both worlds: a successful, planned, plain weave project AND an opportunity to explore structure, color, and fiber.

This Quick Bite lesson is part of Weaving with Stash Yarns. You can follow along and watch Janet and Carly weave their stash yarn projects with our Live at the Loom series on Youtube.
From the Course Catalog:
Stash Weave Along – design a fabulous scarf using bits and bobbins!
Working with Stash Yarns – All the tricks and tips to make working with stash yarns a success.