
Alternating thread gradients like the one my mother, Sue Willingham, designed for my Sunrise Gradient Towels are subtle and gorgeous but winding the one and two end stripes that create the gradual shift from one color to another is DAUNTING.
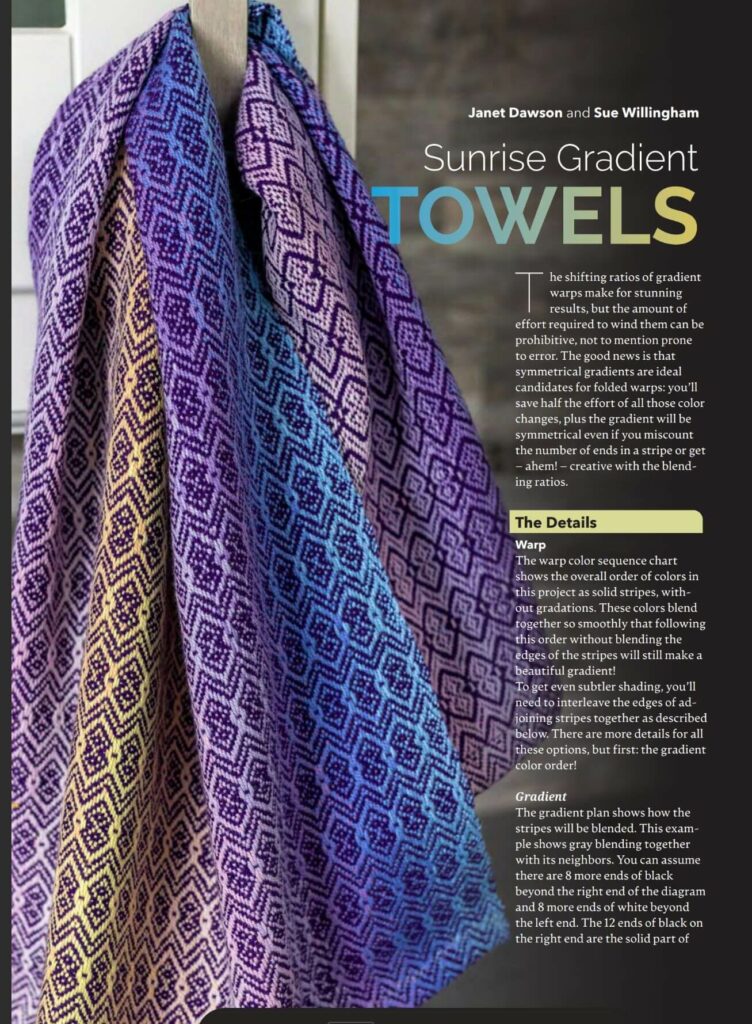
Fortunately, there’s a much easier way to accomplish the goal!
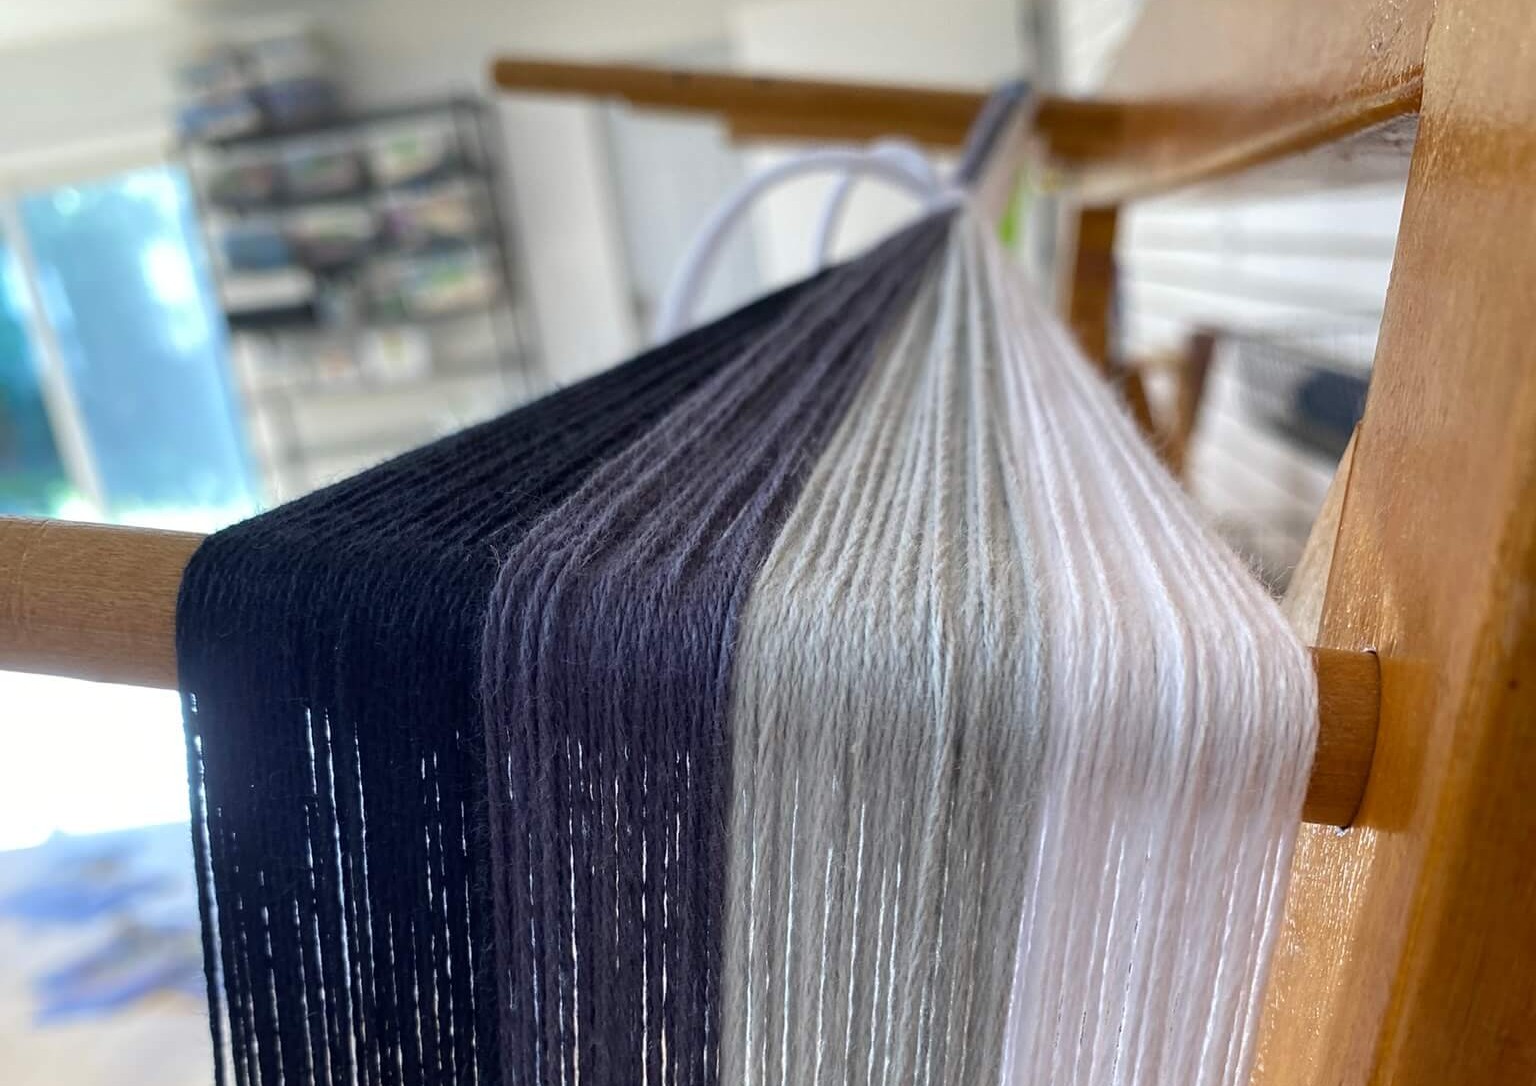
Suppose you have this gradient that shifts from white to black via light and dark grey by alternating the threads at the edges of each stripe:

It’d be a lot of work to wind the warp in this order, cutting and tying for each of those color changes. The good news is that you don’t have to! Instead, wind the required number of ends of each color in solid stripes and then rearrange them while you dress the loom.
Front to back [F2B]
If you sley and thread your warp before you beam, then start sleying from one side and sley all the threads of one color before you start on the next. When you get to the dents where white blends into light grey, sley all the white ends where they need to go, leaving gaps in the reed for the grey ones to fill in later. When run out of whites, backtrack to the first gap you left in the reed and fill it with the first grey end. Fill each gap you left with a grey end until you’re back to the end of the whites, and then continue on filling the reed with grey until it’s time to transition into the next color.
This is exactly like designing in the reed, except that the stripes are all in the same chain.
Once you’re sleyed, thread as usual, making sure to get the warp threads in the final color order, and then beam. Job done!
Back to front [B2F]
If you beam your warp before threading, go ahead and beam it in solid stripes. When you get to threading, rearrange the warp ends into the final, gradient order. You’ve got two options for doing this:
- Thread all of one color first, leaving empty heddles for the ends of the other color; or
- Thread the ends in order, stealing ends of the other color from the next stripe as they’re needed.
In the videos below, I demonstrate both these options. I found the first one a little easier to do in this case, but I was using a simple point threading and the area where my colors blended fit into the threading repeat the same way each time, making it easy to remember which heddles to leave empty. In another situation, I might find Option 2 easier to do.
Here’s the draft I was threading in case you want to follow along with the shaft numbers I’m talking about:

Threading all of the old color, leaving empty heddles for the new color
Threading both colors at once, stealing ends from the next stripe
I left in the minute or two when I was counting and miscounting the dark ends for two reasons: first, to show you how important it is to count as you go! And two, to show you that *everyone* makes mistakes. Mastery of a skill doesn’t mean you never make mistakes! It simply means you know how to anticipate, recognize, and correct them more quickly.
Whichever option you choose, the warp ends will be threaded in a different order than they were in the cross, and that’s okay! They’ll sort themselves out as soon as you remove the lease sticks from the original cross. You don’t need to worry about ends that look crossed behind the heddles, either: they won’t hurt anything while you’re weaving.
Note that you do need to take the lease sticks out of the cross after you’ve threaded, even if you normally leave your lease sticks in and tie them to the back beam.
If you really want the lease sticks in the cross while you weave, take them out after threading and leave them out while you tie onto the front beam. Once the warp is tied on, create a new cross by opening one plain weave shed and inserting a stick behind the shafts, then repeating with the other plain weave shed and a second stick.
Gorgeous gradients are within your grasp!
The instructions for creating alternating thread gradients while threading may sound like a lot of work, but carrying them out is actually pretty quick and painless – certainly more so than cutting and tying for tons of little skinny stripes while winding your warp!
That means that achieving beautiful, subtle gradients is hardly more work than weaving plain old, solid warp stripes. In fact, you can add alternating thread gradients to any striped warp just by blending the edges of the stripes together as described, whether it was designed as a gradient or not!

Want to learn how to design your own gradients with exactly the right rhythm, pacing, and mood to compliment a project? Our course Color Gradients teaches you everything you need to know to design a gradient project from scratch, or to modify the Sunrise Gradient Towels project from WEFT Issue 2: Warp and make it your own.
From the course, Color Gradients:
What is a gradient? Learn what makes a gradient a gradient.
Evenly paced gradients – Master smooth and consistent color transitions.