

Previously, we discussed one method of weaving single shot stripes. These skinny little accents can add a lot of interest to a piece, and can be very much worth the little bit of extra time needed to make them beautiful.
However, some of us (*ahem* me) tend to be more on the “go big” side of design, which can mean going a little heavier on weft stripes. I am going to break this down a little bit, into two shot stripes, and more than two shot stripes, because when I am weaving, I treat them a little bit differently.
When we change wefts, whether we are doing a simple bobbin change, or a colour change, (ssshhhh….these are really the same thing, just using one colour or two) there is a necessary overlap of yarns. When I weave weft stripes, I tend to focus on making these overlaps in a way that is visually pleasing and structurally sound.
Two shot stripes
For a two shot stripe, I prefer to overlap the ends away from the selvedges, and I “scatter” the locations of the overlaps if I am weaving multiple two shot stripes. I feel that doing it this way instead of “stacking” the overlaps vertically draws less attention to the spots with two wefts.
Now, for the details of how I do this:
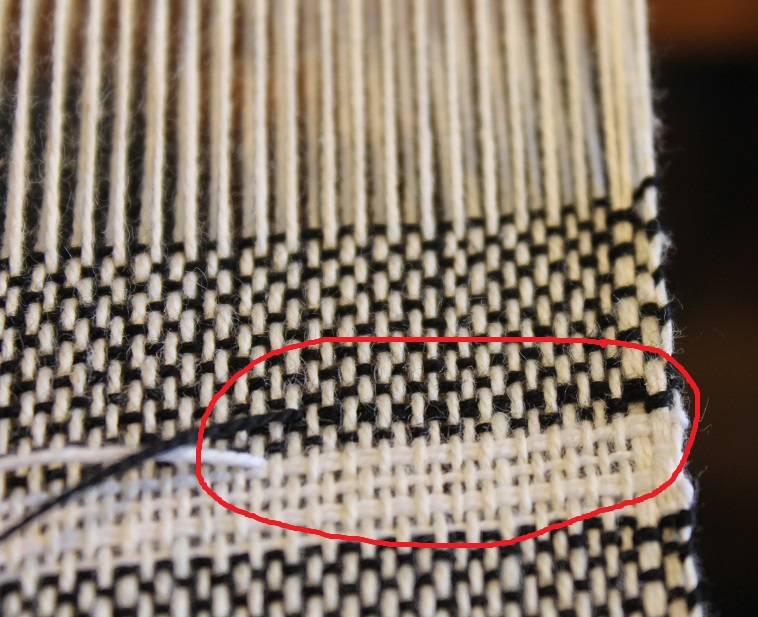
When I have a two shot stripe, what I do is throw the shuttle, leaving a long tail, and beat in the first shot. Then I throw the shuttle a second time but on this second shot I lift the shuttle through the top of the shed, in the location that I choose.
Next I bring the tail that I ever so conveniently left hanging earlier, through the SAME shed, and bring IT out of the top of the shed in a location that overlaps it with the first shed.

Then I beat in the second shot, setting the overlap in place.

Depending on the yarn you are using (these photos show 2/8 cotton, sett at 18 epi), and the contrast between the weft colours you are using, the overlap will show more or less.
BONUS POINTS: If you have a striped warp that contains the colour of the two shot stripe, placing the overlap within the warp stripe of the same colour will camouflage the overlap even further.
Bigger Stripes
For larger weft stripes, it is a different story. I was taught to leave a little tail when I start a new stripe, throw and beat the first shot, then open the second shed, throw the shot, tuck the tail in, then beat, and carry on. At the end of the stripe I was told to clip the weft, then wrap it around the selvedge thread, and tuck it into the same shed as the last shot.
While this TECHNICALLY works, I find that two ends of the same yarn in the same shed looks a little “clunky”, and tends to catch the eye as a mistake (even though it is not a mistake at all).
If you are working on something like a plaid or tartan, with many colour changes, and those overlaps all stack up along the selvedge, it can look like a line of errors, and can draw the eye to the selvedge, instead of the amazing design that you have woven.
One method of making this a little more visually pleasing is to alternate what side you start/end your stripe on, so you end up with the starting overlap on one side, and the ending one on the other side. This works well to visually spread out the overlaps, but it requires that your stripes are always an odd number of shots (which may or may not work for your design, or your preferences), and it doesn’t address the fact that an overlap of two ends of the same weft tends to catch the eye as a mistake.
My solution to this is actually pretty simple, and I find that it has become my default over time.
When I am weaving thicker weft stripes, I weave to the end of colour 1, beat the last shot in, then clip a tail that is 3-4” long. I open the NEXT shed, and tuck that tail in, bringing the end of it through the top of the shed, leaving a tail that is approximately 1” long sticking up.
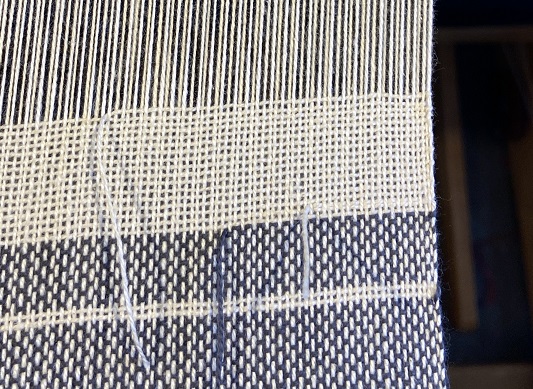
Then, with that shed still open, I throw colour 2. I pull a tail up though the top of the shed, a few ends in from the selvedge, and beat.

This means that in a single shed, from selvedge to selvedge, I have a single weft of colour 1, then the overlap of colours 1 AND 2, then a single weft of colour 2.
The two wefts overlap, with two threads in the same shed, which is structurally the same as a “clunky” overlap, but because there are two colours in the same shed, your eye skips over the part that they are in the same shed. This means that the overlap is nearly invisible, and doesn’t catch your eye as a “mistake”.
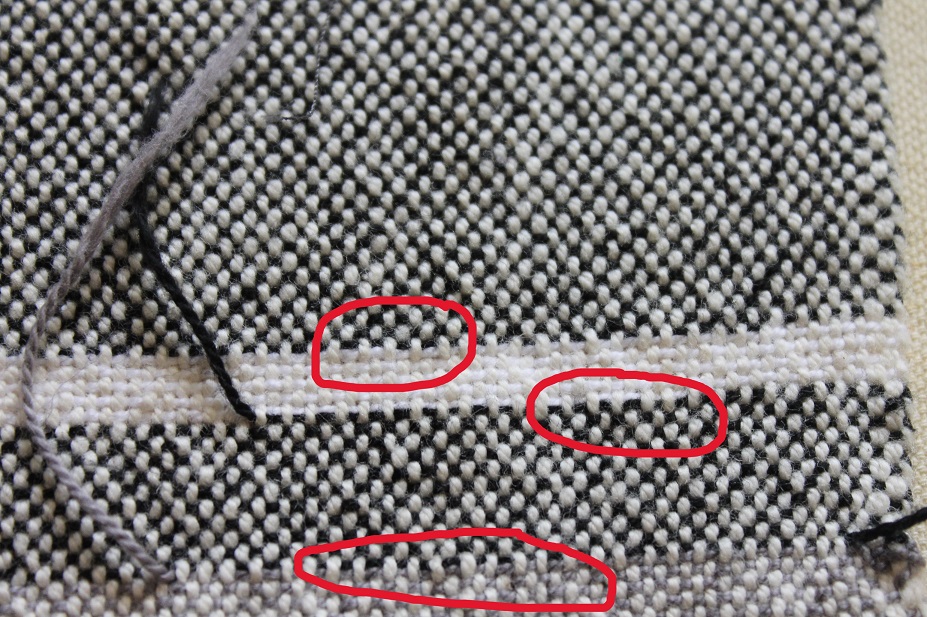
Take a look at this image, which shows wet finished cloth with stripes done in this manner. If you look closely at the circled areas, you can see that there are two colours of weft in a single shed, but unless you look very closely, it “reads” as different sheds.
Try these techniques out on your own weaving, and let me know how it goes!
From the Color Recipes 1: Value and Stripes:
Weft stripes – A quick overview of weft stripes, why you might want to use them, and how they effect a design.
Warp and weft stripes – Some tips to use warp and weft stripes together in your designs, without them becoming chaotic (unless you want that!).
From the Weavers Toolbox:
Keeping track of weft stripes – Some tips to keep track of your stripes, so you can balance them or match them.
Weaving skinny weft stripes – Skinny stripes pack a visual punch, here is one method to add them to your weaving.