
When we are young, we begin our education, usually starting with ways to communicate. Our alphabet (in whatever language you speak) and numbers, then moving on to spelling, reading, writing, and mathematics.
Similarly, when we start our weaving life, we learn a new language. Heddles, shafts, lamms, beams, ends, warp and weft. We learn the meaning of these words in the context of the craft, learn how to count in ways that make sense within our craft, and begin to create.
I have met a lot of weavers, and many times when you meet someone new, the topic of “how did you decide you wanted to weave” comes up.
Not ONCE have I EVER been answered with “I love counting and math”.
But weaving involves a LOT of counting and math.
Let’s look at one example: Measuring a warp. Now you would THINK that this would be pretty straightforward, decide how long the warp should be, figure out how many ends you need (these can have complex answers, but for now, I am going to assume that you already know these numbers), then measure that number of ends using the method of your choice.
Simple, right?
Suuuuure….until the phone rings, or you get distracted by a “helper”, or you change colours, and lose your count, or..or…or…..
I very often use a warping board for measuring my warps, so let’s talk about that specifically here, knowing that a lot of these techniques are transferable to other measuring methods, like warping wheels/squares, and mills. Warping a sectional loom with spools is beyond the scope of this blog post.
Here are some tips for making counting easier.
Use a counting thread
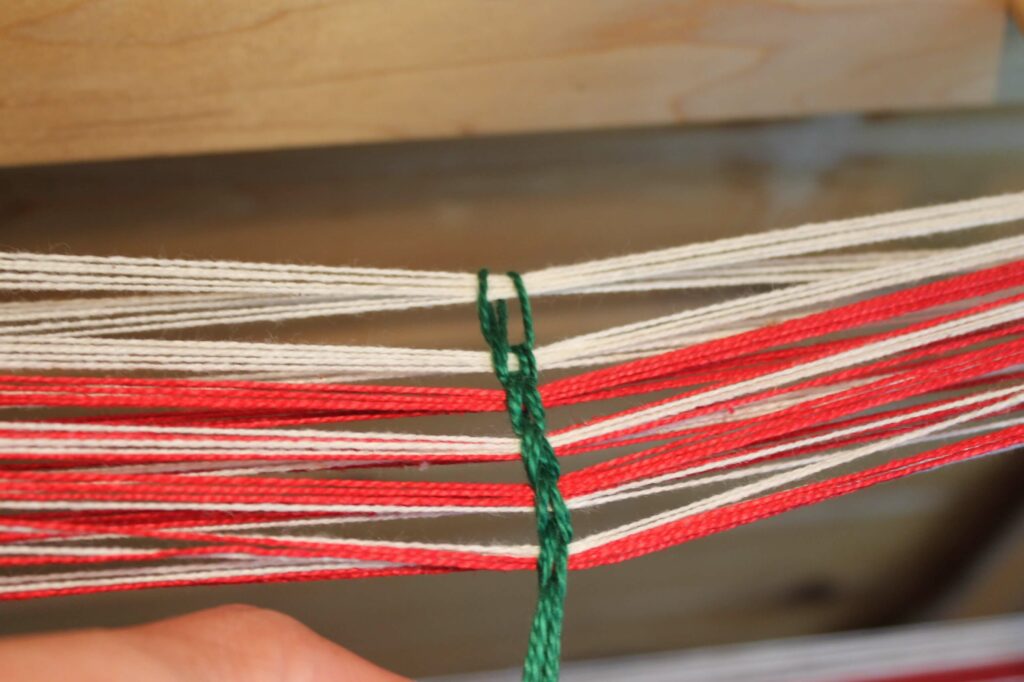
One of my most-used techniques is a counting thread. This is a simple piece of sturdy yarn (I often use cotton or linen that is leftover on a bobbin from a previous project, with an eye to make it contrast as much as possible with the warp colours, for easy identification) that is looped around the desired number of ends, at the cross, during the process of measuring the warp.
Here is a photo that shows the method that I use most, the lark’s-head to start, with a chain around the following groups of threads, with a few groups counted.
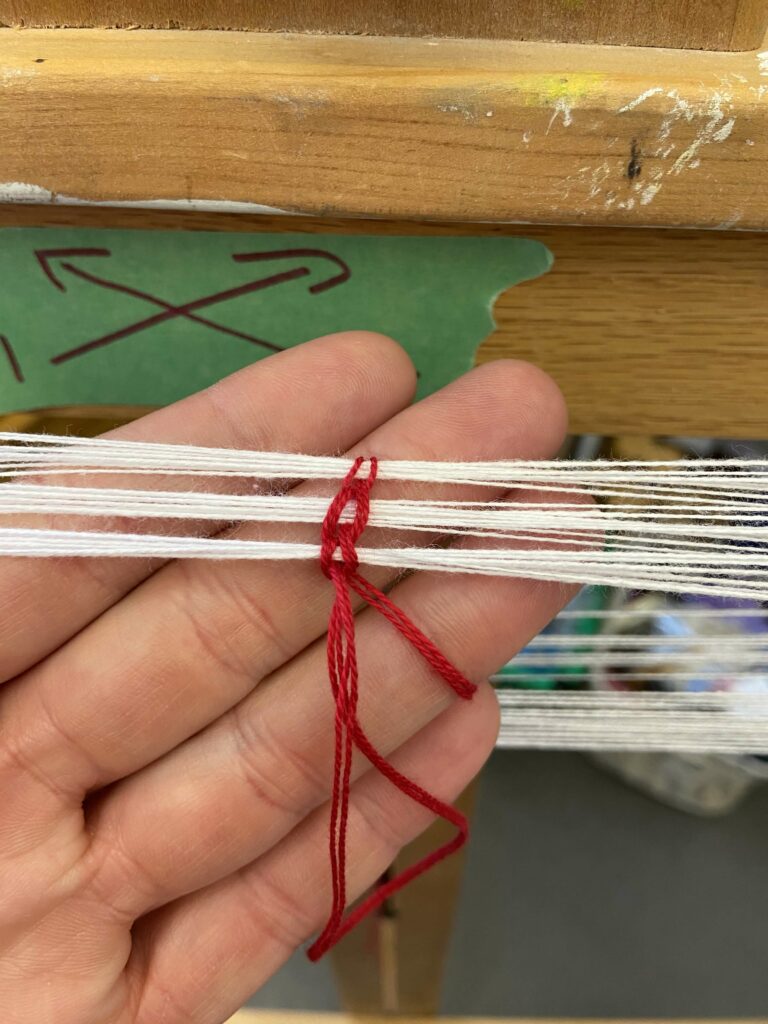
You can see that I can easily count how many groups I have.
Count them all
The most obvious option is to simply count the number of ends as you wind them, until you get to the number you need.
If you have kids/pets/partners/cellphones/TV/any other distraction, you KNOW that this is not an easy thing to do at all. It requires sustained concentration and focus, and often notes to remind you where you are when you realise that your water bottle is empty, and you are parched.
In addition, if the number of warp ends needed is more than can fit easily on the pegs of your warping board, it might just SPROING off the pegs, and end up in a giant tangle on the floor at your feet. TRUST me on this, you do NOT want this to happen to your expensive, handpainted, one of a kind silk chains. (Ask me how I know!)
Multiple chains
A good solution to the “My warp doesn’t fit on the pegs of my warping board” problem is to wind multiple chains, where each is a small section of the total warp each, often called bouts. This is great if your total warp is too large to fit on the warping board easily.
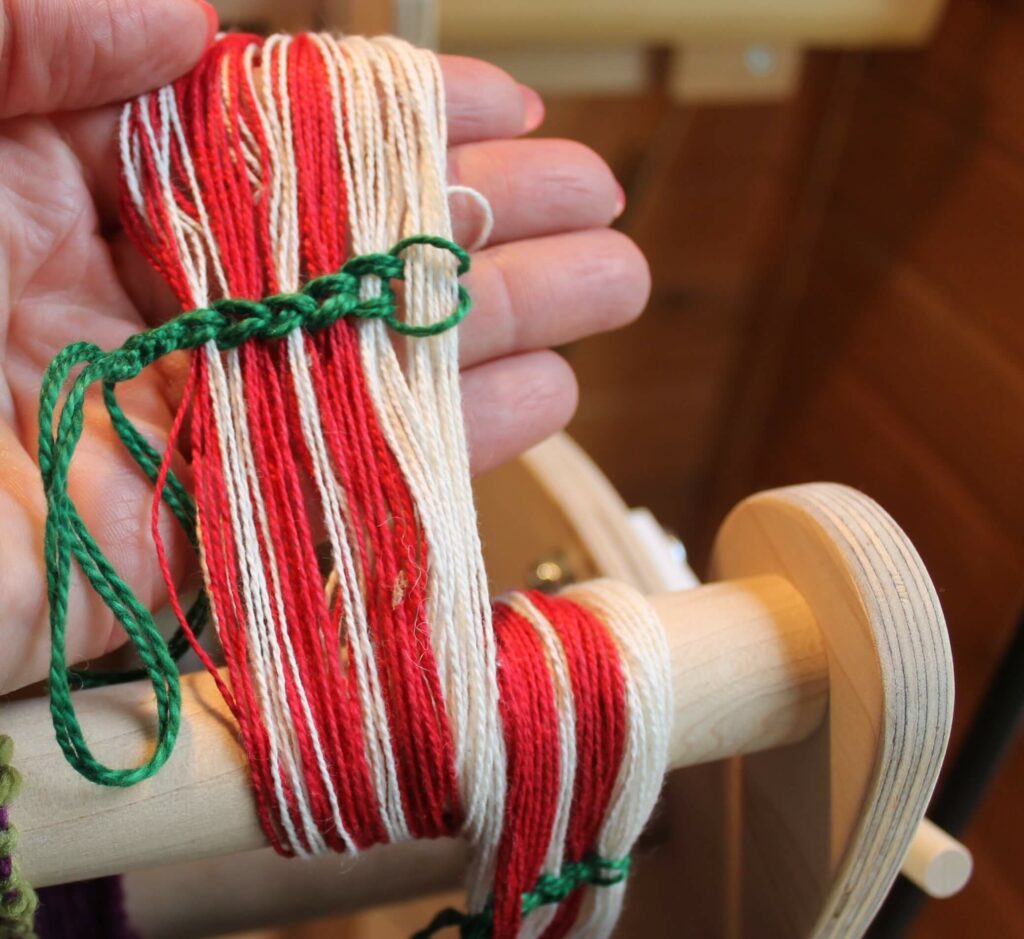
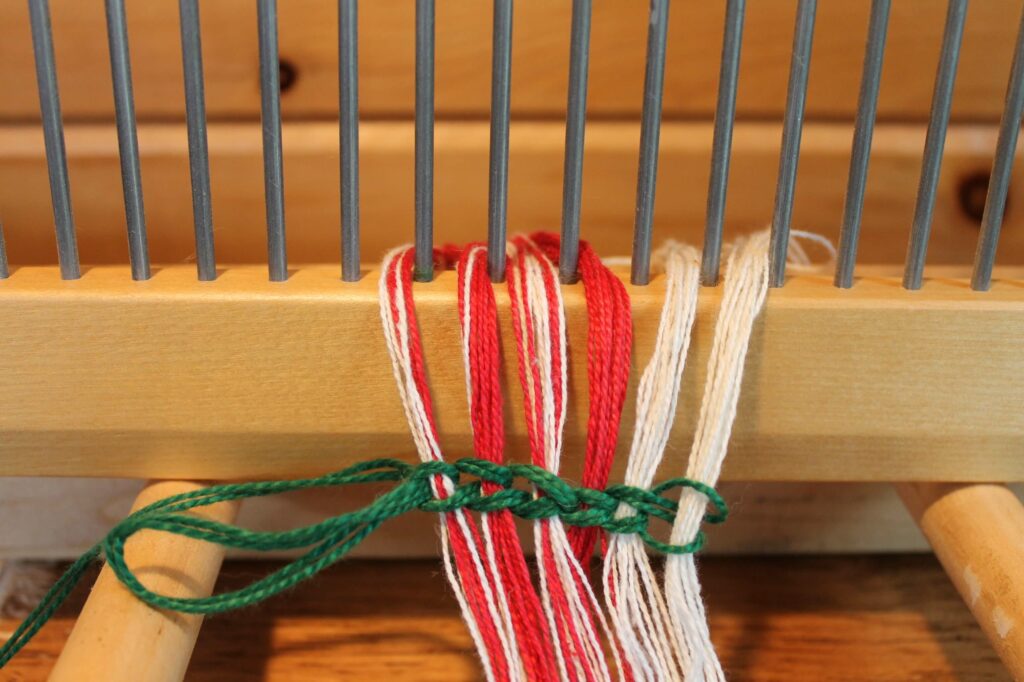
I often weave with 2/8 cotton, and I break my warps into groups of approximately 100 ends. To keep these in the right order, and direction, I always tie my counting thread with some extra loops when I am finished measuring that bout. Then I wrap it around the front beam of the loom it will go on, in its correct place. Before I start dressing the loom, I double check that all of the extra loops securing my counting threads are on the same side (right or left) of the bout, ensuring that I haven’t flipped a section over unintentionally.
Single colour warp – with lease sticks
If I am measuring a warp that is a single colour, and I am planning to use lease sticks (without a raddle) to dress the loom, I will measure the warp on the board with a counting thread that I use to contain groups of threads . I have the luxury of not having small children, pets, or other “helpers” around when I measure a warp, but I still get distracted by…well… everything, so I keep my groups small when possible. Usually ten trips from one end of the warp to the other, which means ten ends if I am holding a single end when I measure, 20 if I am holding 2 ends together, etc.
This is an easy(ish) number to remember, it is quick to measure this many trips on the board, and if I get distracted in the middle, it is quick to count up the ends I have measured since the last loop in the counting thread. If I don’t remember how many threads I have already measured, I can easily count the groups.
Striped warp – with lease sticks
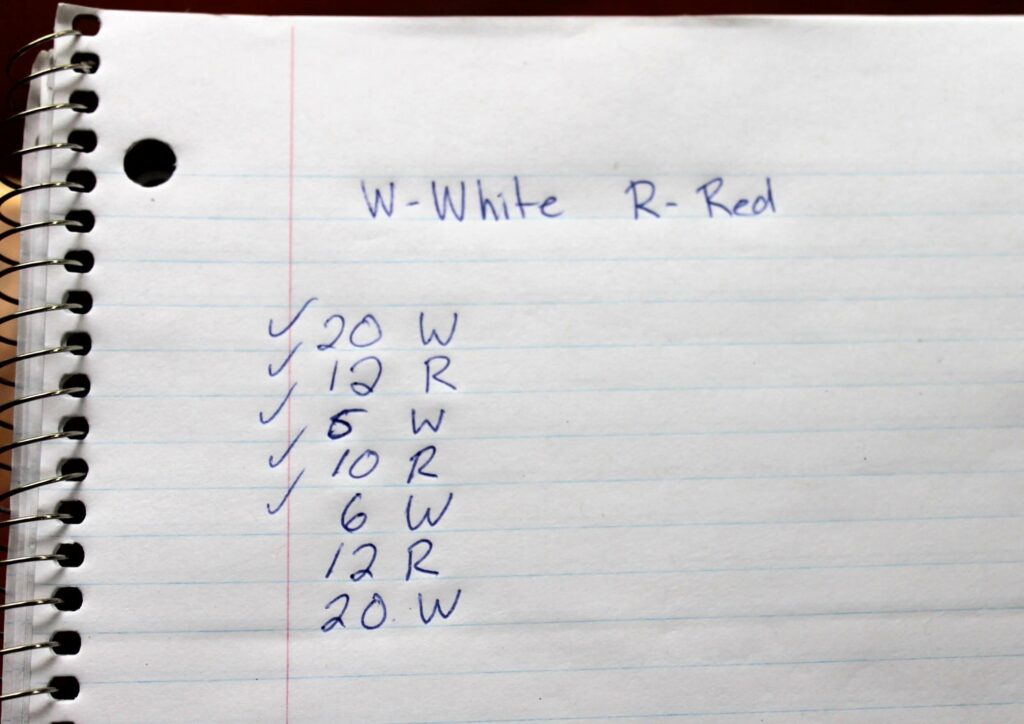
If I am measuring a striped warp, and the stripes are more than a few ends wide, I will often wind one colour, check that I have the correct number of ends, put in a counting loop, then continue with the next colour. This makes it easy to confirm that I haven’t missed a stripe, as I can quickly count the number of stripes and compare that to my colour order, and once I have double checked and confirmed the end count, I can be reasonably sure that I haven’t made a mistake there.
Any warp – with a raddle
When I am planning to use a raddle when dressing the loom, I do things a little differently.
The raddle that I usually use has ½” sections, so I take advantage of that when measuring my warp, to make things go quicker later.
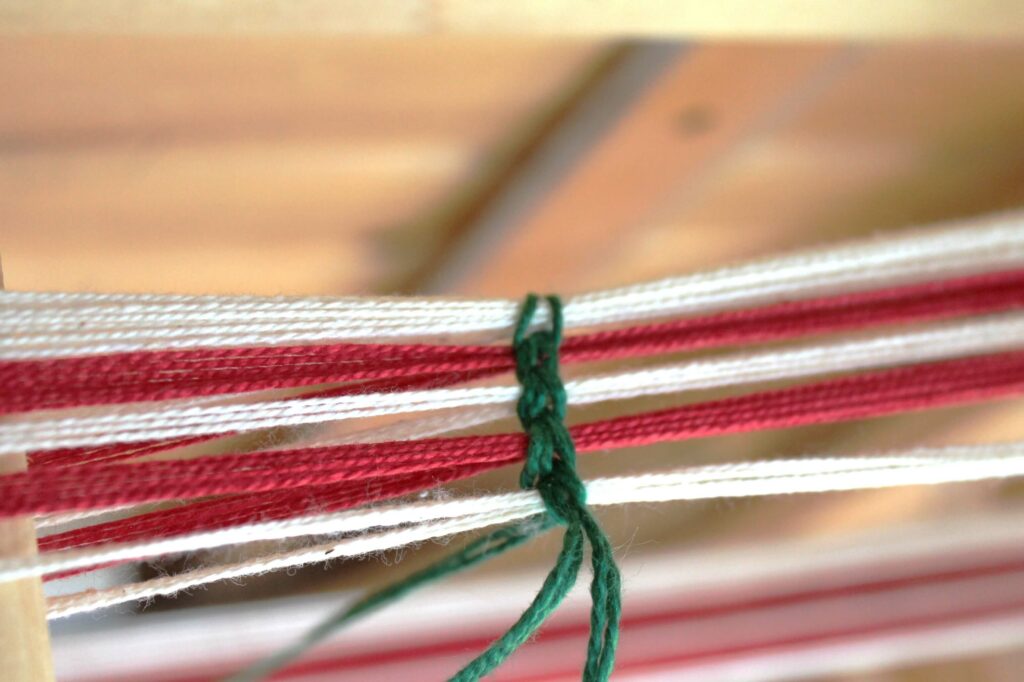
I will measure my warp as usual, but I will write down a colour order (if needed) that breaks things into whatever number of ends is ½” of warp width. If I am planning to sley the reed at 20 ends per inch, I will measure out one half of that, 10 ends, then put in my counting thread.
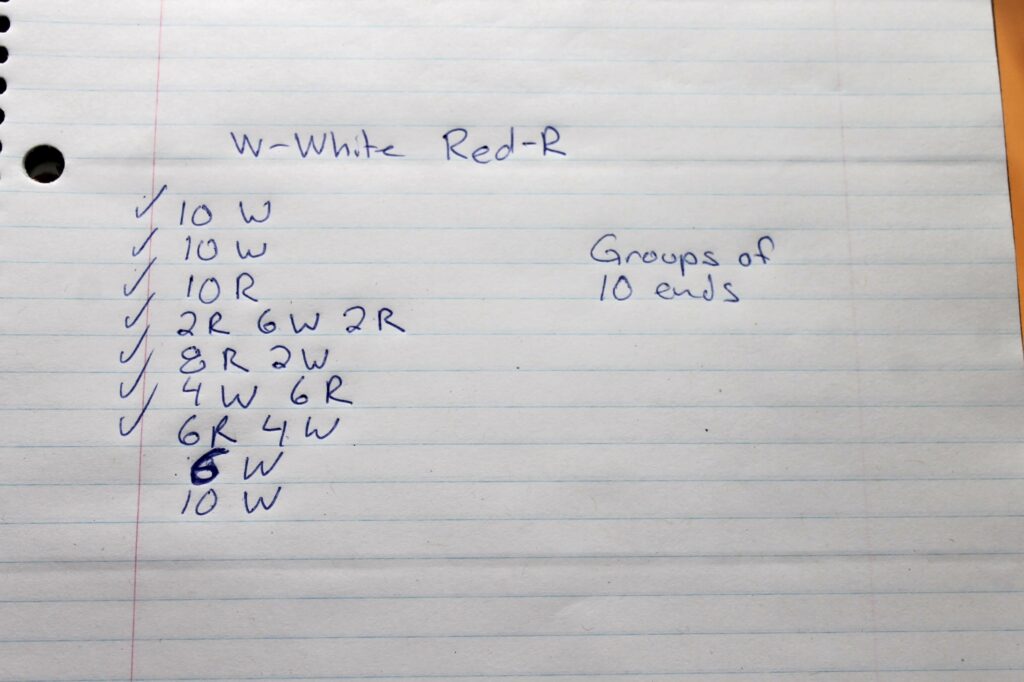
After I have my lease sticks in, I use the counting thread to spread the warp into groups, with each counting group placed in the appropriate section of the raddle. My double checks when using this method is to double count each group before I put the counting thread in, confirming that I have the correct mix of colours and number of ends in the group. When I am done, I double check that I have the correct number of raddle sections portioned out. If I am weaving a piece that is 10” wide, I should have 20 sections.
Note: The colour orders shown here are how I most frequently make notes for myself. If you would like a colour order worksheet that you can download/print and fill out, there is one available to Academy members. (See the links below)
Repeat groups
You can also count your ends based on the number of ends in a single repeat. This works well for single colour warps, especially if your warp has any number of FULL threading repeats. If you have partial repeats at one or both selvedges, you should take special care when counting those ends, but it is not too difficult to remember, particularly if you take good notes.
Breaking down the task of counting is a great way to break up a big job, as well as giving you several points where you can double check that you are on the right track. This breaking down of a larger job also gives you some convenient “breaks” in the work, which allows you to fill your water bottle, change the music you are listening to, or attend to anything else that needs your attention at the moment.
Try some of these methods, see how they work for you, and if you find that you are thinking “what about this way?” try that too!

From the Weavers Toolbox: