
Note: This post was originally posted in the Handweaving Academy’s Weaver’s Toolbox, which is chock full of tips and tricks!
Do you ever avoid a project with lots of stripes because of all the color changes? I know I have! Unless you employ clever tricks (and boy, do I have tricks), changing colours is time consuming, wastes yarn, and is just plain tedious.
Take this stripe plan from one of the projects in my Not Your Granny’s Overshot workshop:

It’s a beast to wind. Look at all those colour changes and single end stripes! You can avoid some of the changes by borrowing from the neighbours (a topic for a later blog post) but you can’t avoid them all, and certainly not those single pink ends in the middle of the blue stripes.
What if I told you there was a way to cut the number of times you have to change colours, and in fact the number of ends you have to wind at all, IN HALF?
It doesn’t work in all cases, but when the stripe plan is symmetrical, as above, you CAN!
Here’s how it works
First, you cut your stripe plan in half, like so:

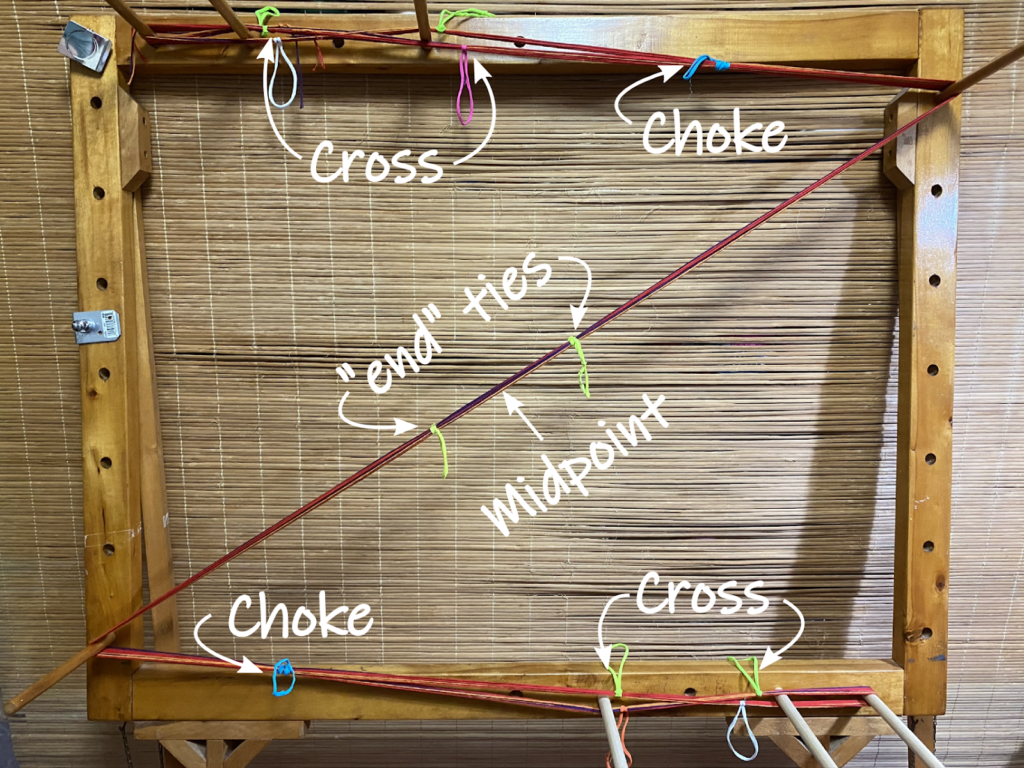
Now make your guide string twice as long as your warp will be and distribute it on the warping board or mill so that it forms a cross at both ends.
I repeat: A Cross At Both Ends.
The cross at both ends is imperative! Without it, all you’ve got is a warp that’s twice as long and half as wide as you really want. This means that, if your usual warping method already uses a cross at both ends, you can’t really make this trick work. Time to learn a new warping method!
Now wind your warp chains following the new stripe plan and making a cross at both ends. When each chain is done, tie it … well, like it’s got a cross at both ends! Whatever you normally do at the cross end, do in both places. Tie BOTH crosses, tie BOTH chokes, etc.
Next, measure to the midpoint of the chain and add two more tight ties a few inches to either side of that midpoint. These will form the new “end” of your two chains once the long chain is folded in half.
Spoiler: I say “folded” but you’re eventually going to cut the chain in half at this point. Chop chop!
These are the ties that are required:

If your chains are long, you might want to add some other organizing ties along the length between the choke and the midpoint (i.e. the cutting point).
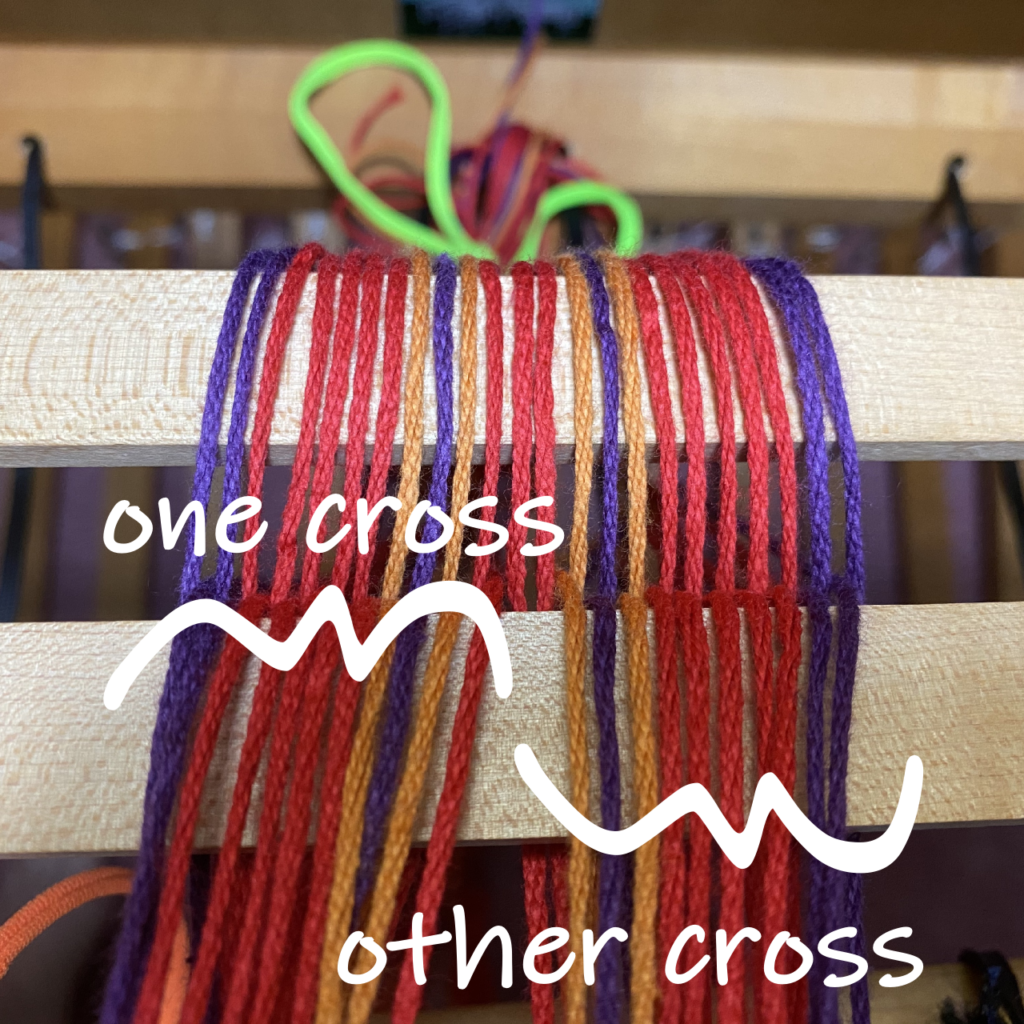
Here’s what it looks like on an actual warp:
This is a short warp just for demonstration purposes, but if the warp were longer the only difference
would be additional switch backs on the warping board to get the length I needed.
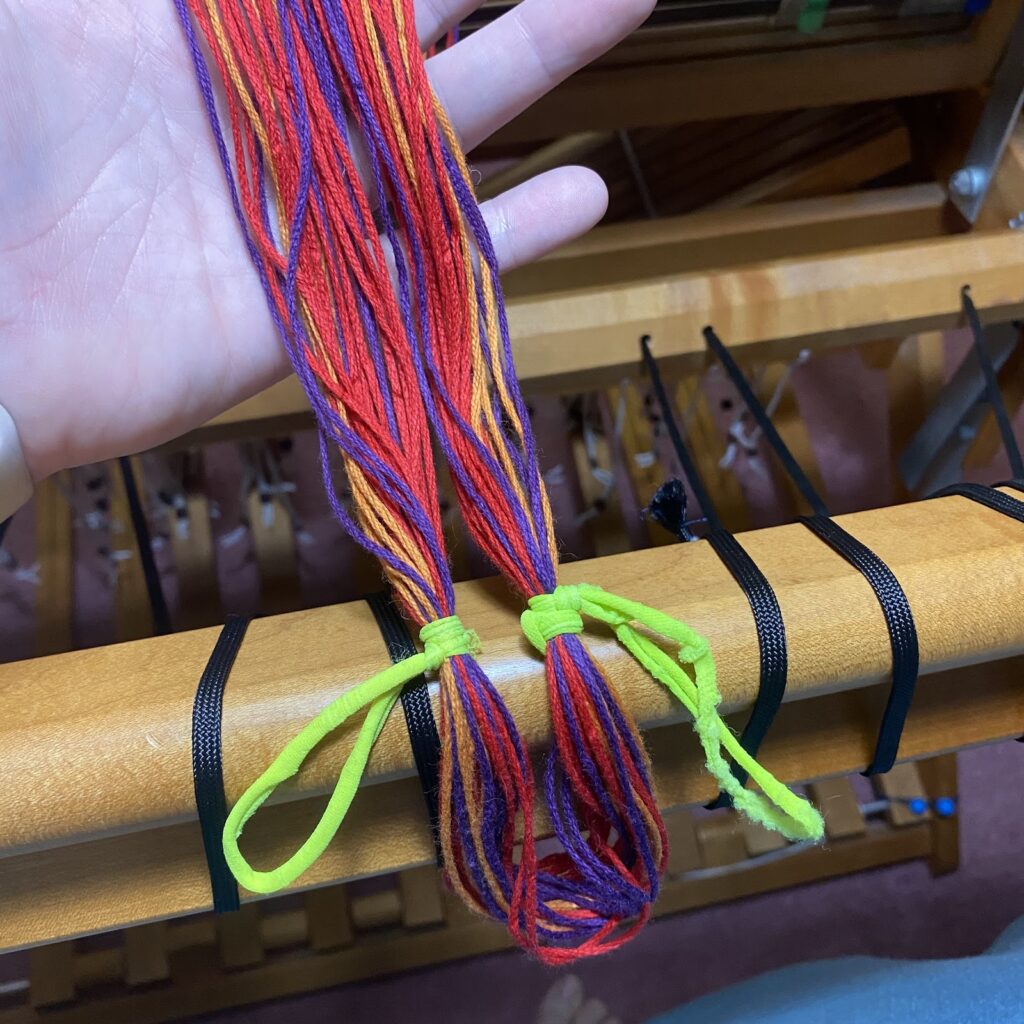
Now cut the long chains in half at the midpoint. Hey, presto: two short chains, each with a cross and choke at one end, and each one half the original stripe plan.
…Not feeling daring enough to cut the chains apart? No worries, you can leave them connected for now and simply fold the warp in half. That’s what I did with this little demo warp, as you’ll see below. If you prefer to fold rather than cut, it’s usually easier to skip chaining the chain entirely. Just fold it and drop it into a box or bag with the two crosses hanging out.
If you ARE feeling daring, though, you’re at an advantage: it’s actually easier to get the chains off the warping board or mill if you cut them, especially if you temporarily tie one side of the cutting point to the board, mill, or another part of the same side of the warp so that when you actually make the cut that half of the chain stays put while you deal with the other half.
Regardless of whether you cut now or later, at this point you’ve got two chains the right length and with the right stripes, albeit possibly connected at the non-cross end.
Now you simply dress your loom with them as you normally do. If you put your cross on lease sticks, put each of the crosses on the lease sticks, with one side flipped over so that the stripes are symmetrical:
If you’re warping F2B and prefer to hold the cross in your hand, just do that. Easy peasey!
Not just to speed things up!
While this “twice as long, half as wide” trick is usually employed to reduce the effort required to wind a lot of colour changes by half, it’s also got distinct advantages for stash warps.
The (folded) End
This is the fold of the sample warp at the breast beam, after the rest of the warp was beamed.
Now it has to be cut apart in order to thread (B2F) or to tie on (F2B).
The next time you have a symmetrical striped warp, why don’t you give this method a try?

Interested in striped warps? Past blog posts “Tips for counting your warp” and “How to wind thread by thread stripes” have some great tips for striped warps.